Thursday, December 8, 2011

Merry Christmas Tag


It's tag time!! And today I've got a tag to share with you that I made using Unity/Samantha Walker's Greetings of Christmas stamp set. I made my tree background with gold peel sticker from Sparkraft Enterprises and filled it in with Green Pearl Crystal Lacquer.
I love the dimension that it created and I think that the way the light reflects on the pearl lacquer looks like pine needles.

Thanks for stopping by!

Wednesday, December 7, 2011

Glitzy Crystal Lacquer Christmas Trees

Tis The Season 
Christmas Train

blchtree1
I began with a package of sisal trees made by Darice. I found them at Michaels for $1.99. Lowes and Michaels also, have a 21 pack with larger size trees for $21.00.
Bleaching Trees


blchtree2
Step 1:  Start by filling a jar
with straight bleach. Place
the trees in upside down, and
closed the lid (I left them between 10 to 20 mins).  The longer you leave them the whiter they get.


Step 2: Once the trees are bleached enough, I used tongs to remove them and rinsed them under cold water, and allowed them to dry on a towel.
blchtree3


pinktree2
Step 1: This part was so exciting to me because of the endless color possibilities.  The bleached sisal trees LOVE Outside The Margins
Color Mists (they soaked 
them right up).
Step 1A: While the tree is
still wet sprinkle extra fine iridescent glimmer dust
(this particular fine glitter will stick to anything wet) then allowed the trees to dry in a warm area.  *Caution- if you use a heat gun to speed up the drying process, make sure you keep it moving or else you will have a charred tree.


*Optional


Decorating Trees


pinktree3
Step 2:  Next using a nylon throw away brush and of course Sakura's 3D Crystal Lacquer.

pinktree3a
Step 2 Continued:  brush
3D Crystal Lacquer 
heavily onto the tree.
treepaint
As another option, after the glitter has dried on the tree, you can lightly brush white gesso onto the tips of the tree branches to give it a snowy look then sprinkle again with
extra fine iridescent
 glimmer dust 

pinktree4
Step 3:  While the tree is still
wet  with the Crystal Lacquer sprinkled glitter onto the tree.


triotrees
To color the above trio of
trees I used the following 
Color Mists colors: 
Margarita Magenta, Sterling Silver and Lime Jello.


Variation 2

whttree00

Step 1:  Start by squeezing
a thick line of 3D Crystal Lacquer onto a piece of
plastic and roll your tree
around in it.
whttree0
Step 2:  Next using a plastic spoon heavily sprinkle the
tree with a *glitter mixture.
(*I mixed several different types of glitters in a dish along with tiny seed and crystals beads)
whttree1
Step 3: Shake off any
excess glitter mixture and
allow it to dry.
whttree3
Step 4:  Using 3D Crystal Lacquer apply it in specific spots on your tree and adhere your choice of individual beads (I chose faux freshwater pearls and crystal beads for this tree).
whttree4
Step 5:  This next step got me very excited again because I lightly sprinkled  Sakura's  Raspberry Iridescent Particles over the
tree that was still wet with
Crystal Lacquer and it
looks amazingly like tiny
tinsel!
pinktree
Here's my finished Glitzy
Crystal Lacquer Tree.
(I must warn you these trees are addicting with all the endless possibilities of decorating they have.)
snowtrees
Here's an close-up shot of  three tiny trees that I colored using a combination of Margarita Magenta and Tahoe Turquoise Color Mists.
letitsnowblk
Here they are on my latest Artist Trading Block.
Get the details for
Entering Aileen's 
Blog Giveaway

Monday, December 5, 2011

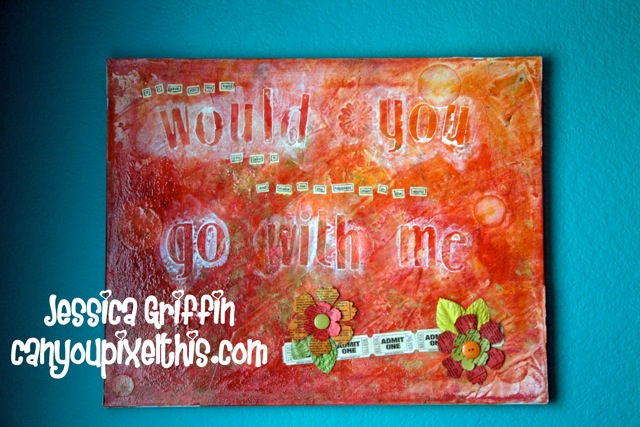
Canvas art.

I love this canvas! I made it for my husband, for our anniversary back in August. I wish I had step by step photos, but, it seems I do my best when I'm not worrying about photographing each step, or working on webcam. It just... comes together! I'm going to try hard to describe the steps, but if you have questions, please feel free to leave them in the comments section, and I'll answer them the best I can!

I used a lot of products, so I’m going to try really hard to link to everything I used.
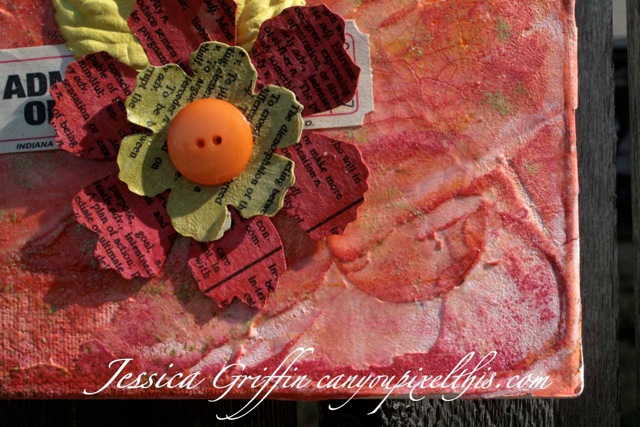
The flowers were made using grunge paper. Cut with a Tim Holtz die, and covered with book pages. I painted them with the stains (which will be listed/linked below) and added a button to the centers.


First, I covered the white canvas with book pages using PPA matte.
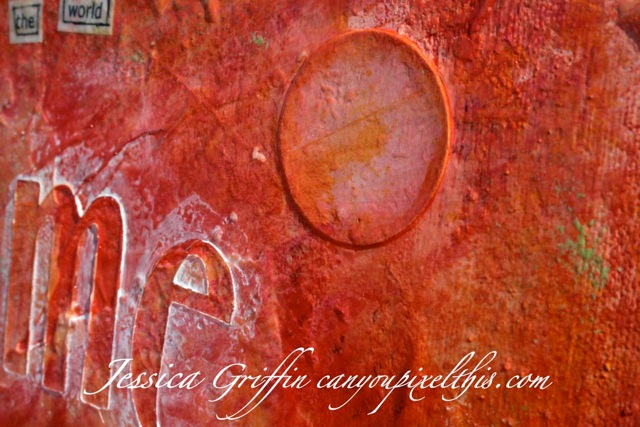
I adhered paper flowers and circles with intentions to paint over them, adding texture.


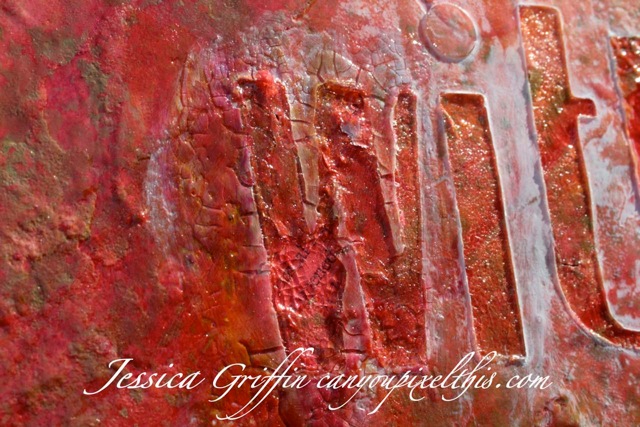
I used Maya Road’s sheer Luxe Stoney Island alphas.
I used Lindy’s Stamp Gang materials to paint the canvas… here’s a list of the products I used and the colors.

Color shots (I mixed the powder with rubbing alcohol):
Tiger Lily Red Orange
California Poppy Gold
Rhododendron Red Rose

Starburst Stains: Bells of Ireland

Mica Powder: Stellar Yellow Red


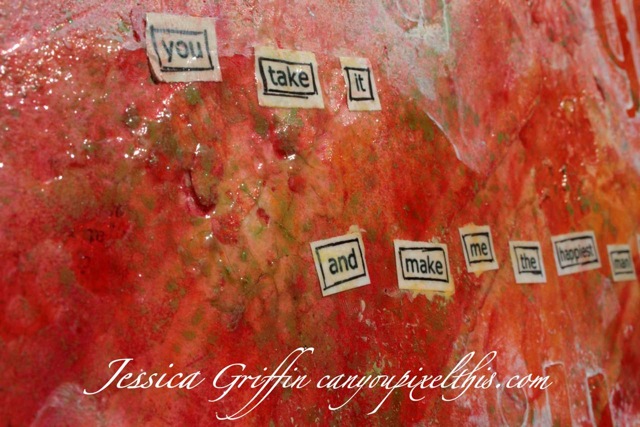
I used Crystal Lacquer to adhere the sheer alphas. I didn’t like that you could barely see them, (don’t ask… sheer, and I expected to SEE them, I don’t know!!) so I added some Gesso to the tops of the sheer letters and wiped the paint off them to more or less outline them. Then I started looking at it, and didn’t like it at all, so I pulled the letters up (while the adhesive was still wet!) and LOVED that, so much more!! So I basically used the alphas as a stencil.


I used USAQ’s 101 Craze and Crackle Paste.

I used reinkers to add color. You know, reinkers that are typically for ink pads!

To use the reinkers, I mixed them with a little water and used my brayer to roll it onto the canvas. When painting the canvas I worked from the lower left corner to the upper right corner. With my darkest color in the bottom, and my lightest color towards the top.


I mixed the Starburst Stain and the Chartreuse reinker and splattered it on in certain areas. The green really helped to break it up a little bit.

I typed out the words on the computer, printed them, and inked them up with some Antique Linen Distress Ink. Outlined them, and used some Crystal Lacquer to adhere them to the canvas. Then… I squeezed my WHOLE bottle of Crystal Lacquer onto my canvas… I used my brayer to roll it all around, and cover a majority of it. I really wanted this to have a glossy finish, I totally got it!! And
I love it!!

Crystal Lacquer works really great, not only as an adhesive but also as a finish. I love that the Crystal Lacquer doesn't diminish the texture at all, and actually enhances it by making it glossy!

Be sure to check out Sakura for Crystal Lacquer. They have a variety of beautiful colors, as well as an extremely FINE tip for their Crystal Lacquer.

Thursday, December 1, 2011

Altered Photo ART by Becky Conley

Hello All!
Are your photos flat? Let's jazz them up!
I'm in mixed-media HEAVEN! I printed one of my garden photos and altered it with SAKURA products and Sparkraft "outline" stickers.

This photo doesn't do the original art any justice, you have to see it in person to appreciate it's glory. The reflection of light on the Gem Particles is AMAZING.

SAKURA SUPPLIES:
3d Clear Crystal Lacquer
3d Color Crystal Lacquer: Black
Gem Particles: Raspberry Iridescent, Peacock Green and Blue Flash

Other Supplies:
Canson Canva-Paper 12x16", Sparkraft dragonfly outline stickers, Matte finish Spray Sealant

DIRECTIONS:
1. The Canva-Paper is textured like canvas! Print the photo and heat-set to hurry the process if you are impatient like me! Then spray with a matte finish to seal the inks.
2. Apply the dragonfly "outline" stickers, apply 3d Clear Crystal Lacquer to the wing areas and sprinkle with Gem Particles. (Blue Flash and Peacock Green) Remove the excess, then fill in the body and head area with 3d Black Color Crystal Lacquer. Let dry.
3. Brush the flowers with a thin layer of 3d Clear Crystal Lacquer, sprinkle Raspberry Iridescent Gem Particles to the center areas only. Let dry and remove excess.

Thank you so much for stopping by, please become a follower for more inspiration and project ideas.

Cheers!
Becky

Sunday, November 27, 2011

Stained Glass ATCs with Crystal Lacquer!


 For my post today, I wanted to share with you a quick and easy altered trading card [ATC] idea. Sakura Hobby Crafts recently teamed up with Sparkraft Enterprises to feature their outline foil stickers. There are so many possibilities with these stickers, and the stained glass look is really easy to achieve.

To complete this project you will need:
Gold Evergreen Sparkraft Enterprises foil outline stickers
ATC size acrylic
Sakura Hobby Crafts colored lacquer
Sakura Hobby Crafts 3D crystal lacquer

I removed the stickers from the sheet and placed it on the acrylic ATC.
I colored in the tree with Green Lacquer--when you go over the lines of the stickers, the outlines will take on the tint of the lacquer but you will still be able to easily see the foil outline.
I colored the trunk brown and the sky with blue lacquer.
For a "snowy" look, I added the 3D crystal lacquer. It goes on cloudy but will dry clear.
When the ATC is completely dry, it takes on the appearance of stained glass.
I can't wait to trade these ATCs with some friends!!

Thursday, November 24, 2011

Oh Christmas Tree!

Well, I guess the Christmas Season is officially here! Were any of you camping out last night to do your Black Friday shopping? Not me! To help promote the Christmas Spirit, I have a card to share with you today. I stamped/embossed a Kanban Crafts tree from Vintage Christmas onto their Mirror Reflective Gold paper. I added green over the gold with Copic markers, and then used my colored Sakura Crystal Lacquer to add my trimmings. The lacquer looks great over metallic papers - almost the effect of a foil-backed rhinestone. I hope you will try this technique!

Tuesday, November 22, 2011

Birdhouse Fun!


The Route 66 stamp from Viva Las Vegastamps! was my inspiration this week for this cute little birdhouse ornament.
I started with some basic supplies:
Route 66 stamp from Viva Las Vegastamps!
Wooden Birdhouse Ornament
Scrapbook paper scraps
Vintage Gold Fine Glitter
Distress Ink - Vintage Photo
Distress Crackle Paint - Rock Candy
I cut scrapbooking paper just a tad smaller than each side of the birdhouse - distressed each edge and glued it down using 3D Crystal Lacquer. I inked the edges with Distress Ink in Vintage Photo to give it a rustic look and to take away the new look of the wood.
For the roof - I used paper that had small license plates (Tim Holtz) which look like shingles and gave it a coat of Rock Candy Distress Crackle to make it look aged. At the bottom I added a layer of Gem Particles and finished off the bottom edge with fine glitter. The stamped image was stamped and embossed, cut out and aged with Distress Ink in Old paper and Vintage Photo.
This was a fun FAST project!
For more creative inspiration - visit Sakura Hobby Crafts blog
and for product info, check out
Enjoy!