Showing posts with label Amanda Marks. Show all posts

Friday, August 17, 2012

Wedding Card

Welcome to my last post for Sakura Hobby Craft Design Team I would like to thank Terri Sproul and Sakura for this wonderful opportunity.  For my last project I created a wedding card for my brother and his new bride


Materials:

  • Polka Dot Paper from Freebie from A.J.'s Digi Shoppe™
  • Sakura 3D Crystal Lacquer
  • Terri Sproul Mixers - Green Pearl Interference and Glitter Green 
  • Tracing Paper
  • Staz-On Jet Black
  • Bird Stamp from Studio G
  • Congratulations Stamp from MJDesigns
  • Green Card Stock
  • Clear Ribbon
  • Want2Scrap Bling


Paint the background paper with the Green Interference, let dry. Fold green paper in half to create card base.  Trim the polka dot paper to allow a boarder on the card.  Taking Green Glitter and Crystal lacquer paint the tracing paper.  Stamp Bird stamp onto another piece of tracing paper with Staz-on.  Trim and mat with the green glitter painted tracing paper.  Place ribbon and paint with green glitter mixer to the card.  Allow to dry and place bird cage center.  Stamp sentiment.  Add two pieces of bling to the top and bottom of the birdcage.


A simple card made from the heart.

Friday, August 3, 2012

Butterfly Wish Box

A while back I started playing with a wooden box, Terri Spoul Mixers and 3D Crystal Lacquer.  I really wasn't pleased with how it was turning out so I put it away for a couple months.


That was the show I did regarding the box.  After a couple of months in hiding I went through and pulled it back out.  I decided to go all out flowers, glitter, butterfly punches and a Zentangled top.  I decided to make a Butterfly Wish Box for my daughter.

Materials:
Wooden Box
Terri Sproul Mixers:  Tanzanite Shimmer and Pearl, Garnet Pearl, Copper and Violet Shimmer
3D Crystal Lacquer
Ultra Fine Glitter
HOTP 3D Flower Template
Mini Bottle Cap
Fiskars® Butterfly Punch
Ultra Fine Bic® Mark-It - Purple
Tissue Paper
Stencil
Stamps
Staz-On Black Ink

1.  Mix lacquer and Tanzanite Mixer together.  Take brush and apply the tissue paper to the box.  Cover completely with tissue paper.  Allow to dry.

2.  Stencil and/or stamp images to the box.

3.  Create flower, cover flower with lacquer mixer.  Add glitter to the top of the box.  Allow to dry.  Punch out butterflies paint with lacquer mixture.  Once dry attach to the front of the box.

4.  Take Bic Mark-it and Zentangle the top of the box.  All of the patterns I used came from HERE - Tangle Patterns.

5.  Finish the inside of the box with mixtures or with fabric.

6.  Add strips of blank paper so it can be filled with wishes.  Give to a special little girl and tell her it is her Wishing Box!

Corner View of the box

Front view of the box

Top of the box

Inside of the box


Friday, July 20, 2012

"The Duke" Wall Hanging


Save the Date for our blog hop right here on July 28th!

Also there will be BLOG CANDY to be won...

three (3) Terri Sproul Mixers and a bottle of Sakura 3D Crystal Lacquer.


Today project is my dad's birthday gift, so dad if you are reading this stop.  My dad loves anything and everything to do with John Wayne.  I decided to create a John Wayne wall hanging for him for his birthday.

This project uses an old CD case for the frame (which for someone like me this is great because I break glass just by looking at it).

1.  Materials:
  • CD Case
  • 2 - Acetate
  • 3D Crystal Lacquer
  • Terri Sproul Mixer - Copper 
  • Brown Dye
  • Background Paper
  • Mat Board
  • Pop Dots
  • Ribbon
  • Exacto Knife
2.  Take Exacto Knife and cut the "nubs" off the inside of the case.  Cut mat board to fit the "front cover" of the case.  Cover matboard with desired background paper.  Glue to the front cover of the case (desired background paper should NOT be glued to the plastic.)

3.  Take photo and bring it into a photo editing program to produce a "cut out" photo.  Take acetate, trace shadows on one pice and mid tones on the other.

4.  Mix a shadow color - Brown Dye, Copper Terri Sproul Mixer and 3dCrystal Lacquer.  Mix a mid-tone color - Copper Terri Sproul Mixer and 3D Crystal Lacquer.  Paint the acetate with Terri Sproul Mixers and 3D Crystal Lacquer.  Allow to dry.

5.  Add pop dots to the acetate.  Place the first piece of acetate (shadow) down first.  Line up the mid-tones and attach with Pop Dots. 

6.  Glue cover shut and hide edges with ribbon.


Friday, July 6, 2012

Bottle Cap Wind Chimes

By Amanda Marks

Today I am taking using some found objects as well as bottle caps from The Bottle Cap Company to create a wind chime.


1.  Materials:
  • Old DVD/CD
  • Fiskars® Butterfly Punch
  • Fiskars® 1" Circle Punch
  • Terri Sprouls Mixers (Shimmers)
  • 15 Bottle Caps
  • Pokey Tool
  • 3D Crystal Lacquer
  • Jump Rings (lots - 75)
  • Bakers Twine
  • Acetate
  • Ruler
  • Spray Paint
2.  Mark off lines 1 1/2" and drawn lines.
3.  Poke holes 1/4" from the edge (there should be 5 holes).
4.  Mark a dot on each side of the bottle cap.
5.  Take a pokey tool pierce through the metal of the bottle cap.
6.  I wanted all of my bottle caps the same color, so I took spray paint and spray painted everything.
7.  Allow the spray paint to dry.
8.  Taking a 1" Circle punch and punch 15 circles.
9.  Take 3D Crystal Lacquer and add one circle to the inside of each bottle cap.  Add a mixer of Crystal Lacquer and Shimmer to Acetate.  Allow acetate to dry.  Take mixers and lacquer mixer and add to the inside of the bottle caps.  Allow the bottle caps to dry.
10.  Take butterfly punch and punch butterflies out of the acetate.  Add butterflies to the inside and the outside of the bottle caps with 3D Crystal Lacquer.
11.  Allow Crystal Lacquer to dry.
12.  Open jump ring.
13.  Place one jump ring through the hole.
14.  Attach a second jump ring to the first jump ring.
15.  Attach the other bottle cap to the jump ring.  Repeat until you have 1 - bottle cap on 3 jump rings, 2 - bottle caps hooked together, 3 bottle caps hooked together, 4 bottle caps hooked together, and 5 bottle caps hooked together.  Attach the bottle caps to the DVD with jump rings.  Take Bakers Twine and attach 5 pieces of twine to the top and create a hanger.  Hang outside.


Friday, June 15, 2012

Father's Day Album Using Want2Scrap


The Sakura Design Team team up with Want2Scrap, I chose the Daddy album for my husband for Father's Day.  With my children's help we created an amazing keepsake for him using Terri Sproul Mixers, 3D Crystal Lacquer and Want2Scrap Products.


Chipboard Album
Materials:
  • Want2Scrap Daddy Album
  • Want2Scrap Nestabling Circle
  • Want2Scrap Say it with bling
  • 3D Crystal Laquer
  • Terri Sproul Mixers:  Garnet Pearl, Green Pearl, Tanzanite Pearl, Shimmer Pink Sapphire, Rose Quartz Pearl, Shimmer Purple
  • Assorted Tissue Paper
  • Scrap Paper
  • Stamps
  • Photos
  • Scissors
  • Ink Pads (I used Tim Holtz Distress Ink Pad: Tattered Rose, Vintage Photo, Walnut Stain - Staz-on Timber Brown)
Trace child's hand.  I had my daughter use the tissue paper, 3D Crystal Lacquer and Terri Sproul Mixers.

Close up shot of her working.  I traced my son's hand and I  did this part for him.

Adding her family drawing to the cover.

The concentration to place bling throughout the book.

The following is the finished book I did black out my children's names off the back cover.  My daughter really enjoyed helping me with this project.

The back page with a letter to daddy from my daughter.  Left side:  My husband and I surrounded in bling. 

Close up of the "Us" page

Right Page:  Kids
Left Page:  Son's Hand Print

Close up of the kids page with circle bling

Son's Handprint - Terri Sproul Mixers: Tanzanite Pearl and Garnet Pearl with Circle Bling

Daughter's Handprint - Shimmer Pink Sapphire and Purple Shimmer with Circle Bling

Close up of the Family.  The heads are my son's fingerprint (Tim Holtz Tattered Rose).  My daughter drew the family.

Finished Album

Friday, June 1, 2012

Recycled Bottle - Plant Watering System

1.  Materials:

  • Empty Beer Bottle
  • 3D Crystal Lacquer
  • Terri Sproul Mixers:  Purple Pearl, Garnet Pearl, Aquamarine Pearl and Pink Sapphire Pearl
  • Want 2 Scrap Butterfly Bling
  • Alcohol
  • Cotton Ball
  • Paint Brush
2.  Soak beer bottle to ease in label removal.
3.  Peeling off the label.
4.  Cleaned!  Clean with alcohol and cotton ball allow to dry.
5.  Paint design with Mixers and Crystal Lacquer.  Allow to dry.
6.  Add Bling and more Lacquer if desired.

Fill with water and shove it in the plant.  I would not recommend this for outdoor plants I would keep these to indoor plants.  If you are like me I kill the indoor ones not so much the outdoor ones, I remember to water them! 

Friday, May 18, 2012

Inspirational Wall Art with Terri Sproul Mixers


I really wanted to experiment with the mixers and with some other items with this project.  I decided to experiment with resin and see exactly what I could come up with.
1.  Materials: Quick Cast Resin, Terri Sproul Mixer - Tanzanite Pearl, paper cup, craft stick and mold (if you are messy like me a piece of wax paper)
2.  Dump Part A into a paper cup add a small scoop (less than an 1/8 tsp) and mix completely before adding Part B.  Add Part B to mixture and mix throughly.
3.  Pour mixture to mold
4.  Allow to set 5-10 minutes
5.  The color will turn a lighter shade of the mixer
6.  Un-mold


I added tissue paper with 3D Crystal Lacquer and Terri Sproul Mixers to create a layered look.  I also used Tim Holtz Distress Inks - Chipped Sapphire, Faded Jeans and Stormy Sky, StazOn Azur Ink Pad, Studio 112 Flower Stamps and Inkadinkado - Picasso Quote Stamp, Tulle Ribbon and flower petal (from my wedding), pop top for the hanger.

I love the way it turned out and was fun and relaxing to do.


Friday, May 4, 2012

Daisy "Window" Bookmark


It is almost summer and that means beach time with a good book, so I decided to make the Princess a new bookmark (I am going to make myself one too!)


Materials:
Acrylic
Bookmark Template
Cereal Box
Studio 112™ 60-30905
Terri Sproul Mixers:  Purple Pearl, Rose Pearl, Garnet Pearl, Shimmer Violet, Shimmer Pink Sapphire
3D Crystal Lacquer
Beacon 3-in-1 Glue
StazOn Jet Black
Ribbon
Dew Drop (Pink)
Tissue Paper
 
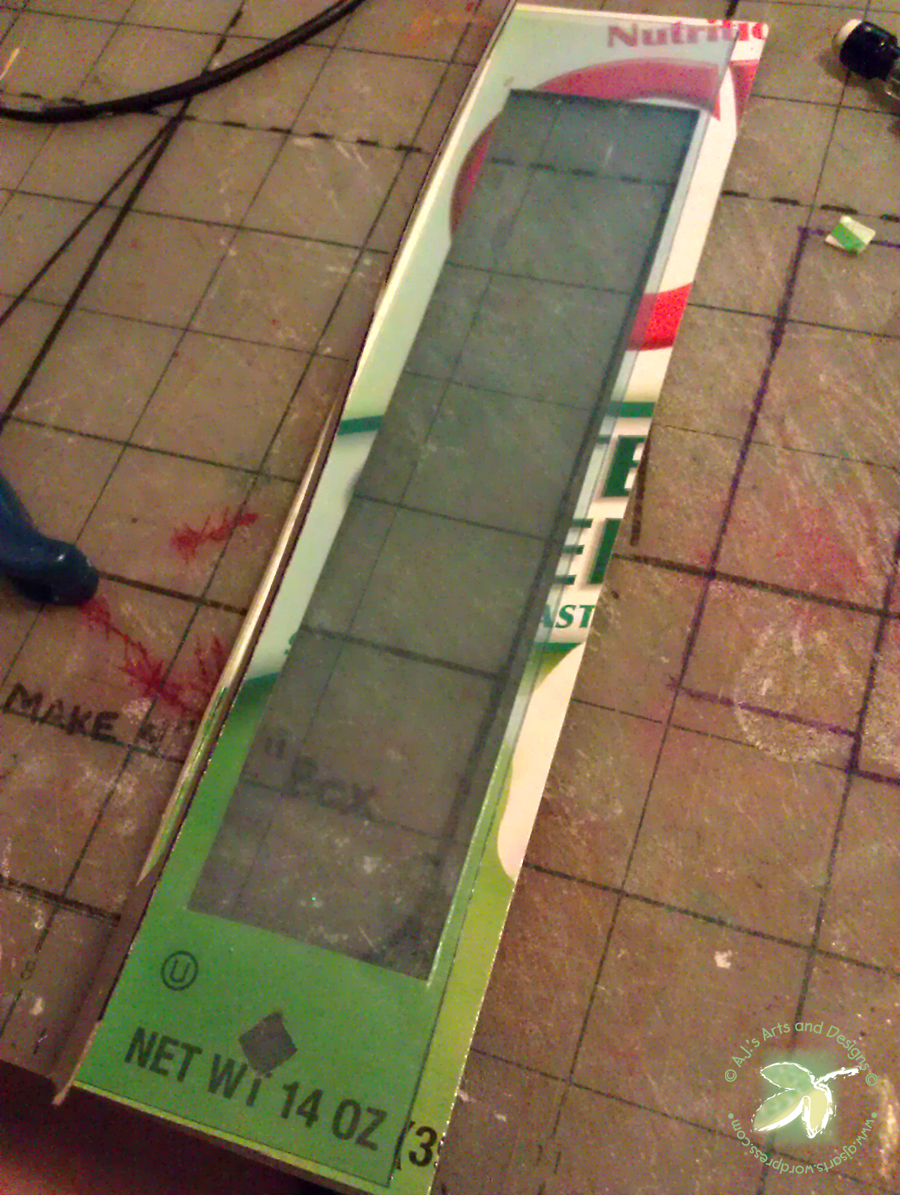
1.  Trace bookmark template onto cereal box and cut out (I did mine on a fold).

2.  Fold Cereal box in half.

3.  Take a ruler and measure in 1/4" on the sides and 1" in the top and bottom.  Cut out the center (folded) with an Exacto Knife.  Optional a Decorative hole punch to add extra embellishments.

4.  Cut acrylic slightly smaller than the cardboard.  Peel the protective sheet off one side and add glue.  Press down the acrylic to the cardboard.

5.  Peel off the other protective sheet and glue it together.  Taking the StazOn Ink Pad - Ink a stamp and stamp image on one side of the acrylic.  Take the Crystal Lacquer and Mixers and Paint the backside of the acrylic.  Taking tissue paper used the lacquer and mixers to adhere to the bookmark.  Allow it to dry.  Add Ribbon and Dew Drop.  Find a good book and read!


Photobucket

Friday, April 20, 2012

Earth Day Inspired Jewelry


Earth Day is tomorrow and I love creating new items from recycled pieces, I really wanted to do an Earth Day inspired piece (in this case pieces).

 Materials:
Used Tape Roll
Tule
Terri Sproul Mixer:  Tanazite Pearl, Ultra Fine Glitter
3D Crystal Lacquer
The Robin's Nest Dew Drops
Cereal Box
Wire
Scissors
Fish Hook Earrings
 1.  Wrap the Tape Roll with Tule - tie knot in end.

 2.  Paint with 3D Crystal Lacquer and Terri Sproul Mixers.

 3.  Place a rim of Lacquer around the top add Glitter.  Allow to dry.

 4.  While drying create earring and pendant.  Use an oval template to create four circles on a cereal box (for the earrings) and two larger ovals for the pendant.

 5.  Cut out the circles
 6.  Glue the circles glossy side together and trim.

 7.  Tie tule around the circles.

 8.  Paint with Lacquer and Mixers.

9.  What you fingers will look like.  I would recommend washing them before wrapping the wire or you will glue yourself to your project.  It is also recommended that you allow the project to dry completely before wrapping (once again so you won't glue yourself to your project.)  Add Dew Drops for finishing touches.

Finished Set - Bangle Bracelet, Earrings, and Pendant

Earrings

Pendant

Bangle Bracelet

Bracelet on my arm

Thanks for stopping by and remember, "UNLESS someone like you cares a whole awful lot, nothing is going to get better, its not."  ~Dr. Suess The Lorax

Happy Earth Day!