Showing posts with label Sakura. Show all posts

Wednesday, July 3, 2013

Celebrate Box

Hi everyone - Dale here!
Hope your holiday week - CANADA DAY here in Canada and 4th of JULY in the USA are AWESOME for you!

I am always telling people to CELEBRATE their accomplishments, whether small or large. So, my first project for July is a little CELEBRATE box, where I can put a note in there for each achievement, goal, etc. through out the year.

I started with a little chocolate box that has been kicking around my stash of boxes for awhile.  The box measures 2.75 X 3.5 inches and is 1 inch deep.
I covered the lid with a scrapbook paper, and gessoed the print on the bottom of the box. The inside of the box was untouched.


The hardest decision - which one of Sakura Hobby Craft’s glass tiles and matching bezel cup.
The glass tiles are available in rectangle, square and circular shapes.
I decided to go with the bronze round one for this project.

I cut the word - "CELEBRATE" from a large print book, then added it to similar colour of paper, then used my only border punch to add similar paper as the box over & below the word.  I used 3D Crystal Lacquer to glue the glass tile over the word.
I tied the organza coloured ribbon through the bail at the top of the bezel cup.


I added a piece of vintage lace over a document seal sticker and a teal paper scrap, then used 3D Crystal Lacquer to glue down the bezel cup. Used it also to glue down the 5 beads around the bezel cup.
I added more vintage lace all around the side of the box top, then added the teal trim over the lace.

For each goal, or achievement that is reached, I will be adding a little note inside. At the end of the year, will record all those achievements in my journal and then start again in January 2014.

July is the perfect time to order all your Sakura Hobby Crafts products, because for the month of July, you can get 20% off your total purchase from Sakura by entering coupon code Summer07 at checkout!

Friday, May 31, 2013

Faux Fused Glass Pendant

Choker with faux fused glass (800x567)

You can make faux fused glass pendants with Sakura Crystal Lacquer and Terri Sproul Mixers!

I had just made some “Crystal Lacquer film” for a project I had in mind when I saw Tammy Tutterow’s tutorial on making faux fused glass pendants with shrink plastic and Ultra Thick Embossing Enamel (UTEE).  It looked like fun, but I wanted to try it with my Crystal Lacquer film instead of shrink plastic, so I postponed the project-in-progress and used my “film” to make my own faux fused glass pendant.

Here’s how I make the Crystal Lacquer film.  The base is the package from a set of metal dies.  I pour in some Crystal Lacquer, add Terri Sproul Mixers and stir.  The package has a little rim that holds in the Crystal Lacquer. These were made with Copper Penny and Green Pearl.  When the Crystal Lacquer sets up, it is adhered to the plastic.  You can cut it with scissors or in a diecutter.

Crystal Lacquer film (800x600)

I diecut some hearts.

Diecut (600x800)
Then I heated UTEE in a Melting Pot.  A word of caution: The Embossing Enamel and parts of the Melting Pot get very hot! 
Melting UTEE (800x600)
I punched holes in my hearts and put a piece of thin wire through each hole.  Using the wire as a handle, I dipped each heart into the melted UTEE.  The Crystal Lacquer film became very flexible when heated, so it is better to have a nice deep reservoir of melted UTEE and make a quick dip.  If you have to move the piece around in the UTEE for too long, it can become distorted (which might be a cool effect for some projects).

I set the hearts to cool on a heat-resistant nonstick sheet.

Dipped and cooling (800x600)

While you are dipping your pieces, you can scrape them against the edge of the Melting Pot to remove excess UTEE.  I was trying to get a thick coating of UTEE and ended up with the UTEE dripping off my pieces.  I trimmed it off with scissors while it was still warm and smoothed out the edges by heating them with a heat gun.  I removed the wires and cleaned out the holes with a small round file.

Trimmed 2 (800x600)
Then I made some jewelry!  Here is one of the hearts with a brass charm on a chain:

Faux fused glass pendant (668x800)

And here is one with a brass charm on a memory wire choker with glass beads:

Choker with faux fused glass (800x567)
This process is easy and has so many possibilities!  You can include embellishments or combine multiple pieces for more complex pendants!

Please let me know if you have any questions!

Sunday, April 14, 2013

Brass Charms with Crystal Lacquer (and a coupon)

Brass charm necklace 3 (800x509)
This necklace was inspired by some charms I saw online.  The original charms were made with wire, paper and resin, but my version is made with brass blanks and Sakura Crystal Lacquer.  Crystal Lacquer made these so easy! 

I’ve seen lots of projects made with pattern tissue paper, but I don’t think I’ve seen any using the instruction pages that come with the patterns.  I wanted some interesting text for my charms, and decided to use pattern sewing instruction sheets.  You could use any kind of paper, but as a sewer, I have lots of memories involving these pages.

I had some brass blanks:
Brass blanks (800x469)
You could use any kind of metal.  Just make sure it’s hard enough that it won’t bend when you wear the necklace.  You could use precut blanks like these, or make your own.  If your metal seems too soft, you might try adding additional layers of metal, paper or Crystal Lacquer.    I think you could even make these charms with plastic as the base.

I chose my paper and then decided to add color to some of it.  I used watercolor paint, but you
could use almost any kind of paint or ink.  I liked the way the text still showed through very clearly with the watercolors.  I let the paint dry before proceeding.
Sewing pattern instructions (800x777)
Then I cut my paper to roughly fit my blanks.  For the first one, I traced around the blank directly onto my paper and then cut it out.  For the next few, I just held the paper on top of the blank and ripped the paper around the edges of the blank.  Then I tried holding the blank in place under or over the paper and cutting around the edges with the paper.  All three methods worked.  Tracing around the blank will allow you to decide exactly what you want to appear on your charm.  Tearing was much less exact, and I wasted some paper when it ripped in ways I didn’t want it to.  Holding the blank to the paper and cutting was simple, but I did get a few crooked cuts that way.

After I cut the paper to roughly fit the blanks, I shaped the paper to the blank more accurately by holding each piece of paper on top of its blank and dragging sandpaper across the edges.  It removed excess paper best when I pulled the sandpaper down in sort of a swiping motion.

Then, for each charm, I lifted the paper off the blank and applied a thin film of Sakura Crystal Lacquer with an inexpensive paint brush.   Then I laid the paper in place and put some Crystal Lacquer on top of it.  When it was dry to the touch, I added another thin layer of Crystal Lacquer.
The Crystal Lacquer acts as an adhesive to hold the paper in place.  It also strengthens and protects the paper and gives it a pretty sheen.  Crystal Lacquer is water soluble, so you can clean up messes as you go and you can clean and save your paint brush when you’re done!

Here are some charms I made from the instruction sheets without adding color:
Brass charms (800x297)
And here are some I made with watercolor paint:
Brass charms 2 (800x303)
I made the necklace from the second set.  I punched holes in each blank after the Crystal Lacquer was dry.  You could also drill the holes.

I love mother of pearl, and I thought buttons would be fun on a sewing-themed necklace.  Then I
added my favorite jewelry components, freshwater pearls and Austrian crystals.

Here’s another view of the necklace:
Brass charm necklace (2) (800x651)
During the month of April, you can use the code TERRI04 to save 20% on Crystal Lacquer at Sakura Hobby Craft.  Now is a great time to try Crystal Lacquer if you are new to it, or stock up if you already love it!

I hope you will make some Crystal Lacquer charms for yourself!  As always, I would love to hear about your projects!

Sunday, March 31, 2013

Burlap Necklace with Crystal Lacquer (and a coupon)

Finished necklace 3 (645x800)
This project was fast, easy and fun!

I have been hand dyeing fibers and I thought it would be fun to incorporate some of my ombre burlap into a necklace:
Dyed burlap (800x595)
I also wanted to try Sakura Crystal Lacquer in Susan Lenart Kazmer’s new Media Mixage bezel cups.  So I decided to put some of my burlap into the heart bezel cups.  Here’s what they look like empty:
Bezel cups (562x800)
Each cup has a corresponding die, so you can cut whatever media you choose and it will fit exactly.
Media Mixage dies 2 (800x692)
I stiffened some burlap with Mod Podge to keep the edges from fraying.  For instructions on how to do that, see my tutorial here.  When it was dry, I cut out the hearts using the Media Mixage dies that matched the bezel cups I had chosen.
Burlap diecuts (600x800)
You can put anything you want into the bezel cup, and make multiple layers.  I wanted to keep it simple, so I poured a little Crystal Lacquer into the cups first, then laid my burlap on that, then added more Crystal Lacquer.  Then all I had to do was let it dry, and assemble my necklace!
Drying (800x629)
I also decided to use a couple of rectangle bezel cups:
Prepared bezel cups (800x666)
I did have a few air bubbles show up in the Crystal Lacquer, which hadn’t happened to me before.  I don’t know if it was because I had multiple layers of Crystal Lacquer, or because I got some air bubbles when I poured some Crystal Lacquer from a big bottle into a small bottle.  It wasn't hard to get them out, but I learned something important.  When I used a toothpick to pierce a bubble, the result was multiple smaller bubbles.  When I used the toothpick to sort of lift the bubble up, it would disappear.  You need to get the air bubbles out before the Crystal Lacquer hardens.

The Crystal Lacquer was perfect for this project!  It holds the burlap in place and protects it at the same time!  You could use almost any media, including paper and other fabrics. It looks a little cloudy in my photos, but in real life, it is crystal clear!

Now is a great time to try Crystal Lacquer, because during the month of April, you can save 20% by entering the code Terri04 when you check out at Sakura Hobby Craft.  You will be amazed at how easy it is to use!

As always, please let me know if you have any questions about this project!

Thursday, February 28, 2013

Sakura Terri Sproul Shimmer Mixers Angel Wings (and a coupon)

Angel wings 2 (800x632)
This is my first post for Sakura Hobby Craft, and I am so happy and honored to be a part of the Sakura Design Team!  You can read about my first adventure with Sakura’s Crystal Lacquer here.

I love Crystal Lacquer! It has so many possibilities!  And Sakura’s Terri Sproul Shimmer Mixers are beautiful!  I really recommend getting a set, because when you see all the colors in front of you, your mind will be filled with creative ideas.  And I have good news!  If you use the coupon code "Shimmer03" now through March 31st, you will receive a 20% discount on the Shimmer Mixers!
Shimmer Mixers (800x600)
I have been designing angel wings for my handcrafted tabletop fabric mannequins.  When I received my wonderful goodie box from Sakura Hobby Craft, I was inspired to make some wings for my mini mannequins, too.

I’ve been making fabric wings, but I thought it would be great to make translucent wings with Crystal Lacquer and Shimmer Mixers. The wings from the Sizzix Angel Wings die are just about the right size for my mini mannequin, so I decided to make a template using the die, rather than drawing a whole new pattern.

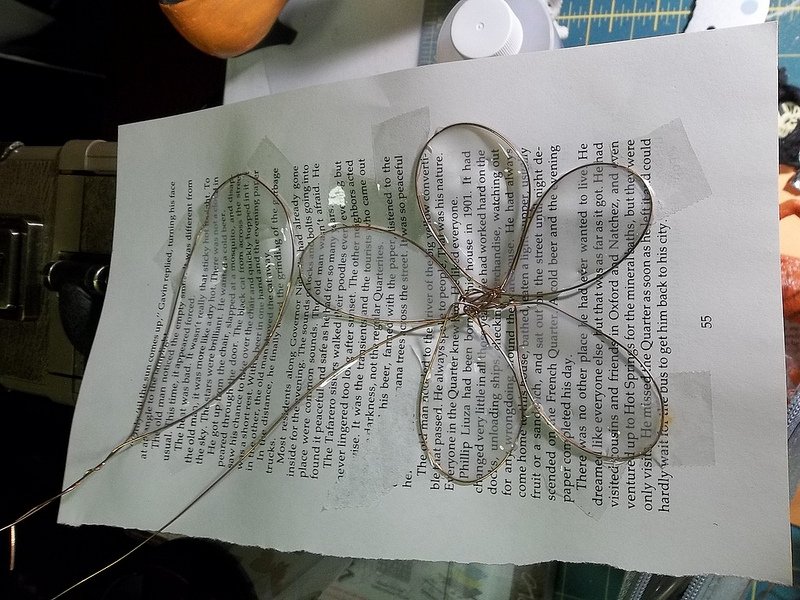
I used plastic presentation covers that I bought at a thrift store.  They are available at office supply stores.  You can also use stencil or template plastic from a craft store.  I wanted it to be thick enough that I could pour Crystal Lacquer into it.  If you don’t have an angel wing die, you can draw one and cut it out with a craft knife.  And you can use this technique for any shape you want to make!

I made two templates:
Template (800x528)
Then I turned one over to make a mirror image.  I wanted a way to attach the wings to the mannequin.  The mannequin is made from muslin, so sewing the wings on seemed appropriate.  I wanted to embed the buttons into the wings.  I placed the templates onto some plastic wrap on a tray.  I taped the templates to the plastic wrap with masking tape to keep them from shifting. I put a little bit of Crystal Lacquer onto the back of each button so they would stay in place while I added the rest of the Crystal Lacquer.  I made sure it wasn’t too close to the edge, because that would make the structure too weak.
Template with buttons (800x595)
Next I mixed Shimmer Rose Jewel Effects Shimmer Powder into some Crystal Lacquer in a disposable container.  I used a plastic spoon to spoon the pink Crystal Lacquer into my template.  I was being pretty careful, but it ran over the side.  This turned out not to be a problem.
Wings in mold (800x600)
I mixed more Crystal Lacquer than I thought I would need, because I didn’t want to take the chance that I would have to mix more and the color wouldn’t be the same.  I had way too much lacquer mixed up, so I got two more buttons and filled the other wings.  There was still some left, so I painted it onto some canvas flower diecuts, some shipping tags and some metal diecuts.  I think it’s a good idea to have some extra substrates ready when you mix the Shimmer Mixers into the Crystal Lacquer, so you don’t waste anything.
Flowers (800x273)
I let the wings set up.  I was able to gauge their hardness by touching the part that spilled over the edge.  When it was no longer tacky on top, I turned the templates over.  The Crystal Lacquer that had been touching the plastic wrap wasn’t dry.  Unfortunately, I made the mistake of setting one of the templates down on the tray without plastic wrap, and it stuck.  I let the wings dry some more
before I did anything else with them.  When they were no longer sticky, I cut the templates and the excess Crystal Lacquer away with small, sharp scissors. 
Wings out of the template (800x389)
The Crystal Lacquer goes through stages while it hardens.  First, it’s liquid and will disperse itself smoothly in a mold.  Then it starts to set up.  At this point, it will stick to whatever you touch it with and it won’t be smooth if you disturb it.  Then it’s no longer really tacky but is still flexible, so that you may be able to touch it lightly, but it may stretch out if you handle it.  There’s a point where you can touch it with your fingers but it will still stick to other things (like my tray).  Then it really sets up but is still pliable and you can work with it.  That’s the stage at which I cut the templates away.  Then it hardens more.

Basically, I had to watch it until it got to the point where I could cut it without messing it up.  I didn’t want to wait until it was completely hardened, because I was afraid if it got too brittle I wouldn’t get a nice cut.

The timing is easier than it sounds, because it really dried gradually. 

Crystal Lacquer is also an adhesive, so it wants to stick to things.  But a little bit of Lacquer that
dripped onto a piece of the plastic popped off easily after it was really hardened, so if I hadn’t let the Crystal Lacquer run over the edge, I may have been able to simply remove the wings from the template.  But I wanted to cut the excess off while it was still flexible.

My next Crystal Lacquer experiment will involve piping a line of Crystal Lacquer around the inside of the template, to act as a dam and hold the Lacquer in.  Then I will see if the piece can just pop out.  That way, the templates could be reused.  I might also try a thicker template.

Once I had my wings cut out, I decided I still liked the ones that had the flaw.  I poured a little bit of Crystal Lacquer into the holes in the wing.  I think I could have skipped that step, but it seemed to safer to patch the holes.  I decided to camouflage the flaws with the little flower diecuts I’d painted with the Crystal Lacquer.  I sewed a glass flower bead into the center of each diecut, then adhered each one to the wings with plain Crystal Lacquer.
Flowers on wings (800x764)
The buttons worked perfectly.  I usually use button thread or several strands of embroidery floss to attach buttons to projects.  I decided to use three strands of embroidery floss that I had hand dyed.  I threaded the floss into a needle, and basically sewed each button in place, then tied three knots on each button.

Here is the finished project:

And here is a closeup of one wing:
Angel wing closeup (461x800)
If you don’t want to mold your own wings but you still want to get the shimmery look, you can paint the Crystal Lacquer mixture onto another surface.  This is the same mixture I used for the molded wings, painted onto canvas:
DSCN2576 (800x600)
I hope you will try this technique.  And I hope you will get some of Sakura’s Terri Sproul Mixers and be inspired!

Please let me know if you have any questions about this project!

Thursday, January 31, 2013

3d Crystal Lacquer Book Page Flower

Finished Flower arrangement
At CHA I saw a chandelier that was embellished with resin paper leaves. I love that idea so I made a book page flower with 3d Crystal Lacquer.

Supplies:
Book Pages
3d Crystal Lacquer
Copper wire- I picked mine up in a large spool from home depot. I think it is called welding wire.
Transparent tape (like scotch tape)


Close up of flowers
 Directions:
Cut off about a 6-12" length of wire (this depends on how big you want your leaves and total arrangement to be). I wanted mine to have about 3" leaves so I cut off 12" and then i trimmed it off later. Make about 3-4 leaves, so that is 3-4 pieces of 6-12" wire.
Copper wire with top looped to make a leaf
Loop the top 4" around and twist it around the stem. You will need to shape your wire to form a leaf.

Tape the leaf down to the book page. You may want to find special words or sentences to highlight. You want to make sure that your wire lays flat on the paper or the 3d Crystal lacquer will seep under the wire. This may take some bending. You don't really need to worry about the tape because it is almost invisible after you lacquer the paper. I just overlap a little tape over the inside of the leaf.
Taped down wire. 

 Now you can create your flower. You can create individual petals and wire them together or attempt one big flower. I was getting tired of making leaves so i wanted to knock out one big flower. Most of the wire molding can be done by hand but I did have to pull out the pliers to wrap the inside of the flower. I left the wire on the spool while I make the flower, because I had no idea how much wire it would take.
Doesn't look perfect, but I can adjust it more later.
Tape the flower down to the book pages too.
Notice my flower already looks a little better.

 Now you can start filling in the 3d Crystal Lacquer. It is ok if there is a little seeping, because you can trim that off later, when we cut out the designs. We just don't want a lot of seep out. I actually had minimal seeping.


Once dry, flip the design over and lacquer the back.

Now you can cut out your designs.
I used an exacto to get into small areas.

Your flower and leaves are now done and you can arrange them however you want. You could make a garland, earrings, ornaments, whatever! I think a butterfly would be cute! You could even add some of the mixers to the lacquer for added color.


Tanya

Tanya Ruffin


Friday, January 18, 2013

Steampunk Mardi Gras Mask Pin


In  Louisiana it is Mardi Gras Season. Everywhere you look you see king cakes, Mardi Gras beads and purple, green, and gold! So to honor my roots I created a Steampunk Mardi Gras Mask Pin. I took a resin face that I had previously poured (that had some imperfections in the left side), some metal gears, watch parts, 3d crystal lacquer and lacquer mixers and rub-n-buff.


Red Pearl & Shimmer Purple
Terri Sproul Mixers.
Watch Parts


Directions
Step 1.


Step 1.

Take resin face ( mine was poured. Few days before with black dyed resin)

Step 2.
Rub with rub-n-buff ( silver), to highlight the raised areas.


Step 2. 
Step 2. 

Step 3.
Take some 3d crystal lacquer and squirt a drop on your non stick mat and mix in a little of the Terri Sproul mixers. I used purple to highlight the eyes as eyeshadow and red to highlight the lips.


Step 4.
Step 4
Step 4.
Then start gluing ( using the 3d crystal lacquer as a glue) the small gears over the right eye of the face. I then use some small watch gears and cross the forehead.


Step 5.

Step 5.
I squirted more 3d crystal lacquer on the non stick mat and glue the three larger gears together. I didn't glue them directly t the back yet because the back of the face want even enough. Maybe using a thicker glue it might work, but I was trying the artfully arrange my large gears.


Step 6.
Step 6.
Once that dried I then pealed it off the mat and trimmed and then attached to the back of the face.


I had planned on some more Mardi gras embellishments, but I really liked my mask this way. Glue a pin on the back and you are done!

If you have issues gluing the three larger gears, you could attach the gears and mask to a circle piece of glass.

Tanya


TK Arts
Tanya Ruffin


Create Studios