Showing posts with label altered art. Show all posts

Tuesday, May 14, 2013

Time Warp Altered Sakura Milk Can

Time Warp Doll 2 (491x800)
My second milk can project is a companion piece to my first ("Time Flies") and a tribute to one of my favorite movies, The Rocky Horror Picture Show.  Even if you’ve never watched this cult classic, you’ve probably heard parts of the soundtrack, including “Time Warp.”
Both time pieces (629x800)
Here’s the milk can without embellishment:
Milk can view of lid (573x800)
I love how Crystal Lacquer sticks to metal!  I prepared my paper to cover my can.  This is a vintage clock face on cardstock, stamped with my phrase in ColorBox Chalk Ink in Dark Brown and painted with 7 Gypsies Color Wash in Walnut Forest.
Paper prepped (800x681)
I coated the cylindrical portion of the can with Crystal Lacquer using a foam paint brush, put the paper in place, and coated the paper with more Crystal Lacquer.  When the Crystal Lacquer was dry to the touch, I added another layer on top of the first.
I had these lovely doll parts that remind me of the friend who first took me to see Rocky Horror:
Doll parts (800x773)
I sewed the arms to the handles on the sides with button thread.  I punched holes in the can, matching the holes in the doll bust, then tied the doll head to the can with embroidery floss.  I used Crystal Lacquer to glue the bottom of the can to the top of a vintage tin turned upside down:
Vintage tin (800x800)
Finally, I made my Time Warp Doll a watch face necklace:
Closeup of necklace (800x727)
I hope you will try making your own creations with Crystal Lacquer.  During the month of May, you can get 20% off your total order at Sakura Hobby Craft.  Now is the perfect time to try Crystal Lacquer and Sakura’s other great products!  Just enter the code “Sakura05” at checkout.

Also, Sakura is hosting a blog hop on May 18th!  The theme is “Fantasy” and Sakura’s Design
Team is dreaming up amazing art to share with you on that day!  There will be prizes, too!  So be sure to check back here on May 18th!

Thursday, February 14, 2013

Last Minute Valentine Candy Box


Need a last minute gift without spending a lot of money?

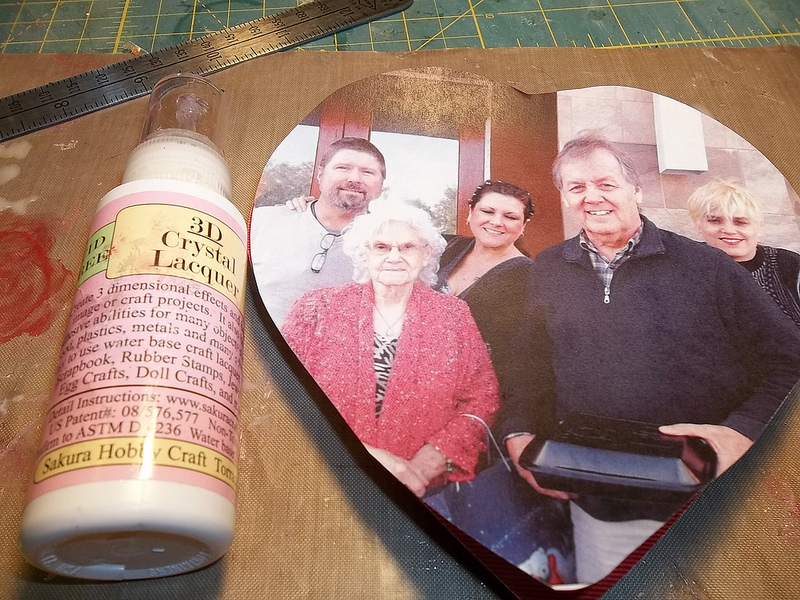
Run to the Dollar Store and buy a small heart shaped box of chocolate. Decorate it with a photo of you and your loved one (or of anything), embellish it and give it as a gift. The candy will last 5 minutes, but the box will last forever! Also pick up some extra and make a special one for Mother's Day!


Materials
Box of Candy- from Dollar Store.
Glue-Elmers or Mod Podge
White Paint
Laquer- 3d Crystal Lacquer
Embellishments- beads, broken pieces of jewelry
Photo- laser copy (from a laser printer or a laser copy). If you use an ink jet printer make sure to seal your photo with fixative before lacquering.


Directions
Find a suitable photo (measure your box) and print out (you can either use a fixative if you are using ink jet or bring to copy store for a color copy).


Take shrink wrap paper off your box

Make sure the photo will fit your box of candy. Trace to heart shape on the photo and cut out.


If your box of candy is any color than white, paint it white- let dry (this is because sometimes you can see through the photo to the red paper- I tried it three times and it showed through when I added glue).


Glue your photo to box of candy- let dry


Add any collage elements.

Using a lacquer, like Sakura 3D Cystal Lacquer, put a light coat on over the photo.


Add embellishments, like beads. I used a thin layer of 3D Cystal Lacquer to glue the beads to the edge. Then once it sat up a bit, I went over the inside edge of the beads with more 3D Cystal Lacquer, so it had more to anchor them to the box.


Add any additional embellishments.


Put the lid on your candy and you are ready to go.

Keep in mind, this process will take about 1 1/2 hours for total project with drying time, so don't be too last minute!

Tanya Ruffin
www.tanyaruffin.com


Friday, January 18, 2013

Steampunk Mardi Gras Mask Pin


In  Louisiana it is Mardi Gras Season. Everywhere you look you see king cakes, Mardi Gras beads and purple, green, and gold! So to honor my roots I created a Steampunk Mardi Gras Mask Pin. I took a resin face that I had previously poured (that had some imperfections in the left side), some metal gears, watch parts, 3d crystal lacquer and lacquer mixers and rub-n-buff.


Red Pearl & Shimmer Purple
Terri Sproul Mixers.
Watch Parts


Directions
Step 1.


Step 1.

Take resin face ( mine was poured. Few days before with black dyed resin)

Step 2.
Rub with rub-n-buff ( silver), to highlight the raised areas.


Step 2. 
Step 2. 

Step 3.
Take some 3d crystal lacquer and squirt a drop on your non stick mat and mix in a little of the Terri Sproul mixers. I used purple to highlight the eyes as eyeshadow and red to highlight the lips.


Step 4.
Step 4
Step 4.
Then start gluing ( using the 3d crystal lacquer as a glue) the small gears over the right eye of the face. I then use some small watch gears and cross the forehead.


Step 5.

Step 5.
I squirted more 3d crystal lacquer on the non stick mat and glue the three larger gears together. I didn't glue them directly t the back yet because the back of the face want even enough. Maybe using a thicker glue it might work, but I was trying the artfully arrange my large gears.


Step 6.
Step 6.
Once that dried I then pealed it off the mat and trimmed and then attached to the back of the face.


I had planned on some more Mardi gras embellishments, but I really liked my mask this way. Glue a pin on the back and you are done!

If you have issues gluing the three larger gears, you could attach the gears and mask to a circle piece of glass.

Tanya


TK Arts
Tanya Ruffin


Create Studios

Thursday, December 6, 2012

Gift Canister Repurpose


I end up with a lot of canisters from a shake I drink daily and have been saving them for a while waiting for inspiration to hit me. One thing I made is a container for Christmas gifts. I often have a lot of small items to give that I may not be in the position to place in a stocking (i.e. mailed gifts). So I came up with a cute recycled alternative to the gift bag


Materials:
Canister
Scrapbook paper
ribbon
Outline Stickers from Sparkraft Enterprises
Terri Sproul Mixers- Interference Blue Pearl
Mailing Tags

Miscellaneous inks
*any additional embellishments


sakuracraft.com


Start of with clean canisters by making sure there are no signs of what originally came in the canister. The first one I pulled the label off and the others I just covered it.


Cut your scrapbook paper to fit around the canister with a slight overlap.


I mixed up some  3D Crystal Laquer and Terri Sproul Mixers- Interference Blue Pearl and painted over the surface of the whole canister.


Next I covered the lid of the canister. Since this lid has a lip on it, I placed the paper in the center and left the edge of the lid visible. The color matched the paper so I just painted with a coat of the  3D Crystal Laquer and Terri Sproul Mixers- Interference Blue Pearl.


Next take some shipping tags, cut to size and take the string out. Cover with a coat of ink (use a light color- I used a distressed green).


Take your Outline Stickers from Sparkraft Enterprises and place on your tag. We will use the stickers as a resist for a second coat of darker ink. If you place your stickers back on the backer sheet when done, you can use several times.

Hang the stickers off the tag for a nice random effect.


Keep both coats fairly light since this is a name tag and we will need to write on top of it.

Finished tags.

Cover the edge of the lid with white ribbon and tie on your tag.
You can embellish your canister with other ribbon or findings.

I wanted my canisters to be used after Christmas so I avoid overly Christmas imagery on the decorating of the canister. The tags are a different story!

I played with decorating the lids too.


Tanya Ruffin

Create Studios