Tuesday, July 31, 2012

Winner

Our Winner
from the Blog Hop is
"Rocky Cross Studio"
.
You are the winner of 
3 Mixer's and a bottle of Crystal Lacquer

please email
Terri Sproul at 
Terri@ultimatescrapbookretreat.com 
with WINNER in the regards, remember to give me your address

Susan Brown got the most vote for her amazing Altered Mirror
Thank For all the support.
we had fun~

Friday, July 27, 2012

All Things Altered Blog Hop


Thanks for Join the Sakura Hobby Craft Design Team 
on this Blog Hop....
and we have some Blog Candy Just for YOU!


You will need to check out each blog on this hop and come back here and 
tell us your favorite please.  It's that easy.  You are enter to win!
Winner will be posted on July 30th - on this blog..
HOPE YOU WIN!
Here are all the link to the blog hop..  enjoy! 

:

Thursday, July 26, 2012

Making a tag with Sakura Hobby Craft and Terri Sproul Mixers!


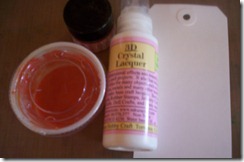
I’ve been making a lot of ATC’s and Tags lately. I love making them because you get some almost instant gratification and they look so good when you’re done. I started out today’s project with the following:

2004-01-03 14.08.09

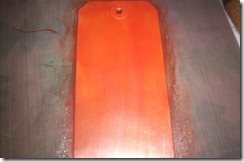
I mixed the Crystal Lacquer with the TS Mixers Using Copper Penny Pearl. The rest was easy………………………………………..  First I painted my tag with the Copper Penny and let it dry:

2004-01-03 14.11.09

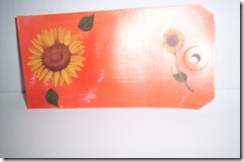
Is this not the most beautiful color? And you should see it in person and up close! This color just looked so beautiful once it dried that all I did was add simple embellishments and voila’ here we have it!

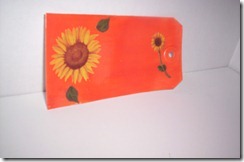
    2004-01-03 15.21.20              2004-01-03 15.21.43

Don’t you think this is just the most beautiful tag for Fall? I loved how it turned out! What do you think? Please also come back tomorrow to our Altered Blog Hop!! I’ve got an amazing piece that I would love to show you! Sakura Hobby Craft has some wonderful bloghop candy for one lucky winner! You really don’t want to miss this bloghop!

Barbara

Tuesday, July 24, 2012

A Little Bit of OZ!

THIS FRIDAY 
Join us for our ALTERED BLOG HOP!
Don't miss the chance to win Blog Candy...  


My project for today... 
A little bit of OZ

Cut images from sheet of Graphic 45 the Magic of Oz Spread Sakura 3D Crystal Lacquer on the back of the Fancy Glass to adhere image. Set aside to dry. Adhere bails to the back using Sakura 3D Crystal Lacquer.
Gently with emery board remove any excess paper. Add seed beads to the edge with Sakura 3D Crystal Lacquer.

Or leave the edges plain.  What a great gift for that person who loves all things "OZ"

The pendants look perfect hanging from the Ball Chain!


Sakura Products
3D Crystal Lacquer
Fancy Glass Tiles
Bails
Ball Chains

Graphic 45 the Magic of Oz Images


Sunday, July 22, 2012

It's snowing in July!

Happy Monday everyone! I am enjoying crafting for for the holidays to get my mind off these 100°+ weather. I choose July to begin my projects for the holidays so that I can take my time and do crafting with my kids along the way. 
Today we made ornaments and light reflectors for our holiday tree. The best part about this project...it's upcycled water bottles!!! The bottoms of water and soda  bottles, Sakura Hobby Crafts 3D Crystal Lacquer,  Terri Sproul's Mixers, Glitter and Want2Scrap Bling make beautiful ornaments and lights! I can't wait to put up my tree completely this year to show off my new sparklies!

The Process

for this project you will need:
empty bottles
Sakura Hobby Crafts 3D Crystal Lacquer
Terri Sproul Mixers
Ultra Fine Glitter
With sharp scissors, cut the bottoms off of the bottles.
trim them close to the turn of the bottle to get the scallop edge.
Mix the lacquer and the mixers for your snowflake ornaments and reflectors.
For my tree I used aquamarine, rose and purple. I applied 2 to 3 coats of lacquer

Mix glitter and lacquer to paint several coats onto the backs of 
several blank bottoms and onto some of the already painted bottoms too.
Those painted with JUST GLITTER next had a coat of silver mixer applied
to make the reflectors.

The bottle bottoms looks fabulous and sparkly...
They are ready to be made into reflectors and ornaments


For those made into reflectors, drill a hole into the center
big enough to fit the light.


For those being transformed into ornaments, glitter the
tops of the bottles and add BLING! To add string to the
ornaments, cut a hole in one spot and thread it through.


Earlier this month on leslierahye's crafty gig I recorded how to cut, paint and glitter the bottoms. Check out the replay for additional ideas!
\


Thank you for looking! I hope you enjoyed my tutorial!~leslierahye

Friday, July 20, 2012

"The Duke" Wall Hanging


Save the Date for our blog hop right here on July 28th!

Also there will be BLOG CANDY to be won...

three (3) Terri Sproul Mixers and a bottle of Sakura 3D Crystal Lacquer.


Today project is my dad's birthday gift, so dad if you are reading this stop.  My dad loves anything and everything to do with John Wayne.  I decided to create a John Wayne wall hanging for him for his birthday.

This project uses an old CD case for the frame (which for someone like me this is great because I break glass just by looking at it).

1.  Materials:
  • CD Case
  • 2 - Acetate
  • 3D Crystal Lacquer
  • Terri Sproul Mixer - Copper 
  • Brown Dye
  • Background Paper
  • Mat Board
  • Pop Dots
  • Ribbon
  • Exacto Knife
2.  Take Exacto Knife and cut the "nubs" off the inside of the case.  Cut mat board to fit the "front cover" of the case.  Cover matboard with desired background paper.  Glue to the front cover of the case (desired background paper should NOT be glued to the plastic.)

3.  Take photo and bring it into a photo editing program to produce a "cut out" photo.  Take acetate, trace shadows on one pice and mid tones on the other.

4.  Mix a shadow color - Brown Dye, Copper Terri Sproul Mixer and 3dCrystal Lacquer.  Mix a mid-tone color - Copper Terri Sproul Mixer and 3D Crystal Lacquer.  Paint the acetate with Terri Sproul Mixers and 3D Crystal Lacquer.  Allow to dry.

5.  Add pop dots to the acetate.  Place the first piece of acetate (shadow) down first.  Line up the mid-tones and attach with Pop Dots. 

6.  Glue cover shut and hide edges with ribbon.


Wednesday, July 18, 2012

A Rainbow of Delight in a Spray Form...MIXERS MIST!

Happy Wednesday! Susan back again to share another project I've created using Sakura 3D Crystal Lacquer with Terri Sproul Mixers...and today I'm going to focus on my little "happy accidental" invention...MIXERS MIST! First a reminder about an upcoming event...

Save the Date for our blog hop right here on July 28th!
Also there will be BLOG CANDY to be won...
three (3) Terri Sproul Mixers and a bottle of Sakura 3D Crystal Lacquer.

I have been making a lot of textural backgrounds lately for various projects so I thought I would share a little more in-depth instruction as to how to make your own mists using Sakura 3D Crystal Lacquer with Terri Sproul Mixers. I have been using the bronze mists I have made and am so excited to make more colors to play with.


This was my HAPPY ACCIDENT...Terri Sproul MIXERS MIST!!!!


I took the contents of my water cup containing the glittery goodness leftover from washing my brushes while painting with Sakura 3D Crystal Lacquer and Terri Sproul Mixers and I poured this into an empty spray bottle. This is a lovely, sheer shimmery spray - very subtle on light paper. I now have a large spray bottle of this and I am using this mixture as a base to make a whole family of mixer mists! 


To do this I have rummaged my house and reclaimed every spray bottle I can get my hands on. I have here an assortment of recycled travel size hair/body sprays, some Ranger Mini Misters, and some small mini sprayers I purchased from Sky Blue Pink.

**PLEASE NOTE** The wash water is directly from the cup. Not sure how much Crystal Lacquer is actually in it. But the bronze mixer - I made from scratch. I filled about 1/2 bottle with water {one of those 1 oz. travel size sprayers}, a few scoops on a toothpick of bronze & copper penny mixers and a squirt of CL. Not so much that it's sticky - just enough so the shimmer will stick to the paper you spray it on. The mini mister tubes don't hold very much liquid {maybe a dozen  sprays or so}, this is why I started with the wash water mix as a base. There is nothing else in my wash water except for Crystal Lacquer and Terri Sproul Mixers.


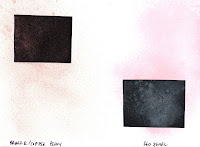
Below are the tester papers I made for the colors I've mixed so far. I added a swatch of black paper to each so I could see how these worked on dark papers. The bronze, gold, silver and interference colors worked best on the black paper. An unexpected result: the colored mists really didn't show up at all - they just leave a white splatter. On white - all of the colors worked beautifully - even the interference violet. The scanner and photographs can't capture all the shimmer reflections - but I promise, the glittery goodness is there!


I labeled each card with the color combinations. I am so excited to play with these!

With my MIXERS MISTS in hand - I got out my new stencils and punchinella to make a fun background in my art journal. 


I sprayed several colors on first layer then let dry and then
heat set to make sure it was entirely dry.


On second layer I added some squares and this gear detail - I love it!


This background is wonderful and goes perfectly with one of my favorite quotes from one of the Masters...Edgar Degas!


I hope you enjoyed today's post. I encourage you to take a look around through the projects from the other Sakura Hobby Craft Design Team members for some great tips and ideas! See you next time on August 1st for another fun and fabulous project how-to!

If you have any questions, please leave a comment, select receive e-mail follow ups on comments and I will respond. If you would like to see more of my creations, please visit my blog sbartist : painting in the dark by clicking here.

Have a wonderful Wednesday : )

Monday, July 16, 2012

Sakura ® Steampunk Art Journal


Sakura ® Present
Steampunk Art Journal
by Gloriann Irizarry


I found this bare art journal at the airport during my last trip and I fall in love it . But I look like something was missing I though the wow all the possibilities. I can decorate my and make my own so I had to get it.

Here you will see how special is now a little imagination and a great product make  my journal into a masterpiece of its own.

It really gives a new meaning to "Never judge a book for it's cover."

Happy crafting and let your imagination free :0)

God bless !
Glori