Tuesday, February 28, 2012

Winner

Thanks so much for all the great comments on
our Blog hop with the
Sakura Hobby Craft Design Team

did they do wonderful work???  
WOW...

Now here is our winner.
Debra Buckland
please contact Terri Sproul
at
Terri@ultimatescrapbookretreat.com
to claim you mixers...

Winner of the most votes 
Lyneen Jesse
with a close second 
Amanda and her amazing Vase
Terri Sproul and her Steampunk Doll
and Leslie Rahye project...

Thanks again for join us. 

Sunday, February 26, 2012

Posies & Paper Dolls with Terri Sproul's Mixers and Sakura 3D Lacquer

Recently I created a necklace for a challenge using Graphic 45 papers and Sakura Hobby Crafts 3D Crystal Lacquer. My daughter really wanted it for herself...I however thought this smaller version with Terri Sproul's Mixers would be more her style. I hope you enjoy it!


paint over printed papers with coordinating colors. here I used Shimmer Red
for the petals, Citrine for the center, Citrine mixed with Tanzanite Pearl for the petals
and Shimmer Pearl for that added glitter on the background.

For the piece of paper dolls, I used the same Citrine/Tanzinite Pearl combination.
The Tanzinite Pearl by itself for the blue dress and the Tanzinite Pearl mixed with
the Enhancer for the deeper blue of the "P." The background was again treated
with Shimmer Pearl. 
Once dry, the glass tiles were attached with Sakura Crystal Lacquer. Once
dry, trim around the glass pieces. 
I attached the heart style silver bails with Sakura Crystal Lacquer as well.
Once dry, I attached both pieces to a Silver Plated Bail Chain.
I think Samantha will LOVE it! The glittery shimmer of the Mixers is truly her.
 Thank you for looking! I hope you enjoyed my project! ~leslierahye

Friday, February 24, 2012

Blog Hop

Thanks so much for join the Sakura Hobby Craft Design Team
on their Blog Hop
Each member of the Sakura Hobby Craft Design team
has been play with the brand new product just introduced at 
CHA 2012 Winter show.


we are doing some really fun blog candy this time around
here how it will work

*  Must go see each of the team project and leave them a comment
* then come back here and tell us which was you favoite
* Share this post on facebook

Winner will receive
a 3 pack of Terri Sproul's Mixers 
and a Bottle 
of 
Crystal Lacquer
Here is a list of all the Design Team Blog.  


Thursday, February 23, 2012

Jazz up Your Chipboard


I think everyone is in love with chipboard these days. And if you are like me, you are always looking for great ways to "dress" your chippies. I love the way this berry embellishment turned out, just by add Sakura Crystal Lacquer in Moss Green and Berry.


Stamps: Inspired by Stamping Sweet Aviary
Patterned Papers: Prima
Cardstock: Core'Dinations
Wow! Embossing Powder - Suzy West Bay Area Blue
Chipboard- Dusty Attic
Sakura: Crystal Lacquer in Berry and Moss Green
The Twinery Baker's Twine

Saturday, February 18, 2012

Meet our New Desing Team

I am proud to announce the New Sakura Hobby Craft Design Team for the New Six months... This Team will continue to post on Monday, Wednesday and Friday will new project for you to view. Under each of their Photo I will post their link to their blogs. Please stop by their blogs and welcome each of them..


This team is very excited about starting. So make sure you stop by and support them and all they do with Sakura Hobby Craft products....

Thanks for stop by Terri Sproul

Hats Off with Sakura ® by Gloriann Irizarry


I love to create doll fashions and I have to say not outfit is complete with out the perfect hat and with this product you can achieve this and so much more in combination with the Terri Sproul mixers you will get an amazing metal look with out the metal work. You will enjoy to work with Sakura 3D crystal lacquer once your start you cant put the bottle down. I guarantee it
Happy crafting !

Friday, February 17, 2012

A Nautical Fix w/ Becky Conley

Welcome crafty peeps! This is my last post with the Sakura Team, (sad face) it has been creatively fun!
The New Design Team will be announced on February 19th, please stop by to meet them.

Today I've created a "nautical fix" to a keepsake box. There was a clock in the front, but it arrived damaged and had fallen out of it's socket. It is also supposed to be a memory keepsake with an area in the lid for a photo or small artful image, but I turned it into a pin cushion.

SAKURA SUPPLIES:
3d Color Crystal Lacquer -Blue
3d Color Crystal Lacquer -Sky Blue
3d Color Crystal Lacquer -Glitter Aqua
3d Clear Crystal Lacquer
Gem Particles -Blue Flash

Other Supplies:
Wood memory box, hot glue, fabric batting, broken watch part, brass dolphin charm, small piece of chipboard.


The clock was square, therefore so was the hold it left in the box. It was quite deep so I filled it about half full with hot glue before adding a layer of 3d Color Crystal Lacquer -Blue and 3d Color Crystal Lacquer -Sky Blue. When that was completely dry, I added a thin layer of 3d Color Crystal Lacquer -Glitter Aqua and let it set for about 15 minutes before setting the charm on top.


After this step was completely dry, I added a layer of 3d Clear Crystal Lacquer.
I also used 3d Clear Crystal Lacquer to adhere the metal circle which is part of a broken wrist watch face and the Gem Particles -Blue Flash around the edge.


The pin cushion is chipboard with 2 layers of batting covered in fabric and inserted into the photo area of the lid.


Thank you so much for stopping by to share my project! I have really enjoyed this team, I'm just too busy :o) (Happy Dance!) Best of luck to all of you who do apply.

Please come back here to the Sakura Hobby Crafts Blog often for more projects and inspiration.

Cheers!
Becky

Wednesday, February 15, 2012

Get Your Grunge on...

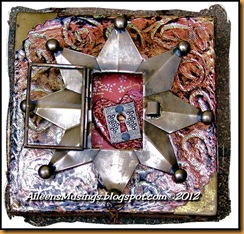
Grungy Heart Shrine

...by creating your own grungy textured heart shrine.  When I created this grungy shrine I used the same color mixers as I did creating my Fly Away Torso Necklace and my Art Saves Torso Lamp

Supplies Used
Plain Canvas
Stazon Ink Pad
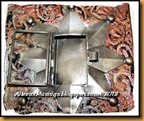
Metal Shrine
Rusty Elements
Key Hole
Textured Background Technique
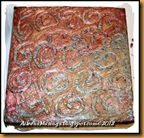
heartshbk
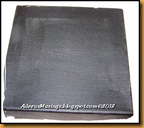
Step 1: I started with a white blank blank canvas and painted it with *black gesso.  *I used gesso because I wanted a matte finish.
heartshbkgrd1
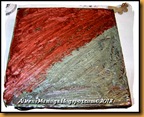
Step 2: Using a mixture of the, copper,  Bronze and the pearl green  Terri Sproul mixers I painted triangle sections on my canvas using a *plastic throw away brush. *Once the mixer dries it will harden and ruin your brush, it's better to use a cheap throw away brush.
005
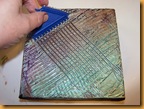
Step 3:  I used a plastic comb to draw texture into the wet mixture.  Use whatever you have around.


Step 3a: Once you've combined the colors by combing through the wet mixture set aside to completely dry.
heartshbkgrd2
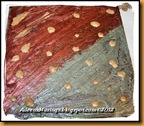
Step 4: Once again paint your mixture onto the dried canvas this time add dots of of the gold jewel effect.
heartshbkgrd3
Step 5: Using the end of  a paint brush or stick draw swirls into the wet mixture  blending the gold dots and allow to dry completely once again.
Step 5A:  Once your canvas has dried completely add 1-3 layers of clear 3D Crystal Lacquer over the entire canvas.  This will fill in areas and give even more depth to your canvas.
Sides of Canvas
 heartshrineside1
Step 6:  Add some layers of washi tape to the sides.
heartshrineside
Step 7:  Paint the sides with more of your mixture and a couple of layers of clear then allow it to dry completely.
heartshrinestaz Step 8: Now that the canvas is dry using a Stazon ink pad swipe it over the top and the sides of the canvas to give the piece a more grungy worn look.
heartshrinebk1
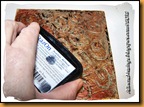
Step 9: Draw an x on the backside of your canvas big enough to fit your shrine into.
heartshrinebk2
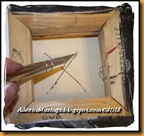
Step 10: Cut an x into the canvas using an Xacto knife.
heartshrinebk3
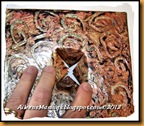
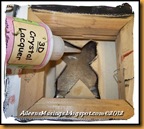
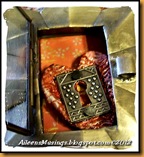
Step 11: Fit your shrine into the canvas.
heartshrinebk4
Step 12: Glue the backside of the shrine, weight it and allow to dry.
heartinside2
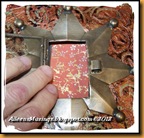
Step 13: Next cut I cut some complementary Washi paper and glued it inside the shrine.
heartclay
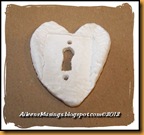
Step 14:  Using paper clay I created a heart and allowed it to dry.
heartclay2
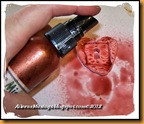
Step 15: I then colored the heart using Copper Kettle Color Mists.
heartshrinehrt
Step 16:  Next fit and adhere your heart inside your shrine.
heartbkchn
Step 17.  add a rusty chain for a hanger.
heartshrineclup2
Step 18:  And add a few rusty embellishments connected to chains so that they hang down from the base of the shrine.
heartshrineclup
Stop by Aileen's Musings to check out 
more projects, tips and techniques!

Sunday, February 12, 2012

Mixin' It Up with Sakura, Terri Sproul's Mixers and ATCs


I will be the first to admit I have two new addictions. The first are these small little pieces of art known as Altered Trading Cards [ATCs]. The second is Terri Sproul's Mixers--I just can't stop sticking them into  Sakura Hobby Crafts Lacquer products. I hope you enjoy these awesome effects you can achieve with Terri's Interference Mixers and Gold Dust.

This started with me die-cutting some ATCs from my Tim Holtz Alterations die.
I cut them out of 1/16th inch acrylic. I attached and trimmed where necessary
Outlines stickers from Starkraft. I did this with a technique for some
Holiday ATCs this fall and loved it! I had to update the look with Terri's Mixers
Rather than adding the Mixers to 3D Crystal Lacquer, I picked some colors
of the 3D crystal color lacquer to alter. Wait until you see!!
The "green" was a much darker green with the Pearl Green in it and the gold
is yellow with Gold Dust in it. The colors are so pretty and intense. I love the
pearlescent effects the green takes on with the Mixers.
On the side with the outline sticker, I color in the petals and leaves with the colors
mixed. I add just a smidge of the gold to some brown lacquer and paint the centers.
For the Dragonfly ATC below I colored on the sticker side with teal colored lacquer
with lilac pearl mixer added for the wings. The purple wings used the purple glitter
colored lacquer. The bodies of the dragonflies are black with Blue Pearl Mixer--YUMMY. 
Then on this butterfly I decided to fill the Blue Pearl mixed in black over the
wings of the butterfly. The butterflies body was filled in with black straight up.
I really loved the reverse of this one and decided to do my background
treatment on what is normally considered the front. Wait until you see!!!
The background is mainly transparent but has spots
 of shimmer where the interference is.
This one shimmers blue or purple pink depending
on how the light hits it.

Where the light areas are on this one, the background
has the glitter pink and it sparkles...the spots where the
Mixers were splattered into the wet lacquer make the little
spots of color...kind of like inclusions in rocks. Very fun!!

I hope you enjoyed my ATCs. The transparency and shimmer is just amazing on the acrylic ATCs