Tuesday, June 26, 2012

My Love of Paris!

More of My PARIS Chipboard Book!

and 
The Paris Chipboard Album includes chipboard pages, rings and the laser cut Eiffel Tower pictured above.
This week I painted the chipboard pink using craft paint (page 3). Distressed it with brown ink. Since it would be hard to get the detail of the Eiffel if I covered the page with pattern paper I tore a piece of pattern paper just shy of the image, distressed and adhered. Then adhered the Eiffel Tower Laser included in the kit image from Want2Srcap with Sakura Crystal Lacquer. Once I had it in position I covered the Eiffel Tower with Sakura Crystal Lacquer and set aside to dry overnight. Covering with the lacquer Eiffel Tower protects it from getting destroyed with use.
Here is the cover I created in my last post and the Eiffel Tower from page 3.
Up close of the Eiffel Tower after the Sakura Crystal Lacquer has dried.
Next I with Sakura Crystal Lacquer adhered a lady from my vintage French postcard collection. Added a few Prima Flowers.
On the opposite page I added a light coat of Sakura Crystal Lacquer with Terri Spourl's Mixer - Gold to give the page a more vintage look. The picture of the Eiffel Tower is adorned with one of Want2Scrap Nestabling Fancy Tags
Here I have sparingly added a little ink to distress the flowers. With my fingers add a smidgen of Sakura Crystal Lacquer to them and sprinkled with Terri Sproul's Ultra Fine Glitter.

More Paris to follow in later posts!

Sunday, June 24, 2012

Cycles, Sprockets, and Lacquer


The laser-cut cover and nest-a-bling
Happy Monday! Today I am sharing with you another awesome product from Want2Scrap--Sakura Hobby Crafts is teaming up with their products this month for their projects. I saw this laser-cut chipboard album in their inventory and immediately knew I wanted to use it for Will's Firecracker 100 photos. For the last 3 years Will has participated in an annual cycling race/ride that occurs in our area. His first ride was 10 miles, he was 9 and he rode with his Dad. His last ride, last year he rode 26 miles solo. I am always amazed at his determination for this sport and proud of his accomplishments. This album was perfect for sharing that story and creating for him a book of memories.
The Spritely Sprocket album comes with a laser-cut cover and matching nest-a-bling, 4 additional 8×8" pages, and rings. I hope you enjoy my project!

The Firecracker 100 Album--method


inside cover with title


First year spread. The pages were covered with tissue and paper adhered with Sakura 3D Crystal Lacquer. The edges were highlighted with mixers--as was the laser-cut cover of the album.


Second year spread. Photos were matted with white card stock. Year cards were hand written and doodled and a bicycle brad was added to each.


Third Year Spread. Stamps were added to continue the store of determination and success. 

Thank you for looking!

detail of cover and nest-a-bling
I hope you enjoy my project! My son has already given his seal of approval and loves looking at his progress. Want2Scrap has HUNDREDS of chipboard albums and accessories to chose from!! 
~leslierahye


Get Your Bling Here

Thursday, June 21, 2012

A Mixed Media Piece using Sakura 3D Crystal Lacquer and Terri Sproul Mixers and Want2Scrap Products


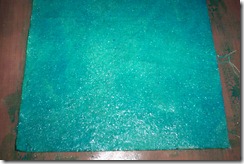
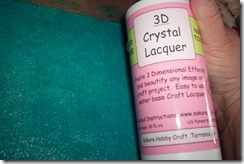
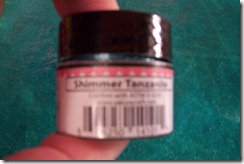
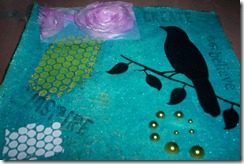
I’ve had such a fun time today playing with the above items and more. I started out with a 6X6 canvas piece from Want2Scrap and covered it with Crystal Lacquer that had been mixed with Shimmer Tanzanite Terri Sproul mixer.

blog pictures 040      blog pictures 041

blog pictures 043

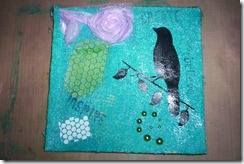
I thoroughly enjoyed using the lacquer and mixers. It was so beautiful when I painted it on the canvas and what was nice was that it stiffened the canvas too. I then had fun adding a peel and stick bird from Want2Scrap, and I also added some green pearls from Want2Scrap, added some rubons and stamped words, create, inspire, believe and then topped it off with a piece of ribbon roses from Want2Scrap that I had colored with a Pitt Pen. I love my Mixed Media piece! And isn’t the background wonderful? I also used the Crystal Lacquer as a glue for the bird and the rose.

blog pictures 044      blog pictures 045

I really like this! How about you? I think I may put a little hanger on it and hang it in my craft room.

Barbara

Tuesday, June 19, 2012

Altering a Want2Scrap Corset using Sakura 3D Crystal Lacquer and Terri Sproul Mixers

Happy Wednesday! Susan back again to share a project I've created using Sakura 3D Crystal Lacquer and Terri Sproul Mixers...along with Want2Scrap chipboard and embellishments. I've created a pretty wall decor using one of Want2Scrap's specialty chipboard blank books - the CORSET.


Want2Scrap has loads of interesting chipboard and acrylic blank books, words, shapes and tons of frilly and blingy items to embellish them with. I begin with two blank corset pages.


Chipboard Corset Album has 5 pages and measures approx. 11 1/2" long x 7 1/2" wide.


Blue Rose Ribbon is fantastic for borders or as a stand alone item.
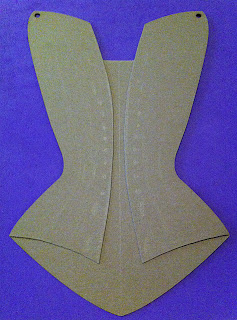

Using a stylus I marked some lines on the chipboard shapes, then cut two of the five corset pages accordingly. I want to make my corset more dimensional by adding layers.


I punched holes for lacing the corset on both sides. **A TIP** to get the holes the same on both sides, I laid the two sections on top of each other and punched them at the same time with my Crop-A-Dile.


Using a detail tipped applicator, I applied stripes and scallop details with a mixture of 3D Crystal Lacquer and Green Pearl Mixers.


I mix up some Shimmer Tanzanite Terri Sproul Mixers with 3D Crystal Lacquer to paint in my background. For the peek-a-boo layer, I applied a mixture of Violet Pearl Mixers and 3D Crystal Lacquer.


After paint is completely dry, I apply and set eyelets for lacing.


I cut a section of roses from the blue rose ribbon and adhered down to be the frill at the top of the corset. I just love the texture and detail these add to the corset. I use the chipboard scraps I cut away as spacers to assemble sections together. Nothing goes to waste here. The eyelets and ribbon will need extra space between layers so these will be perfect to balance the layers out. I laced up with a plaid ribbon tied off with a purple satin at the top. I finished off the bottom edge with a piece of lace and also at the top of the peek-a-boo.

Presenting "Of Corset's an Altered" Want2Scrap corset.
"You are all laced up and ready for the party Miss Scarlett..."


I hope you enjoyed today's project. Please take some time to stroll around through projects from the other Sakura Hobby Craft Design Team members for more great tips and ideas! See you next time on July 4, 2012.

If you have any questions, please leave a comment, select receive e-mail follow ups on comments and I will respond. If you would like to see more of my creations, please visit my blog sbartist : painting in the dark by clicking here. Have a wonderfully crafty Wednesday : )

Monday, June 18, 2012

Sakura ® Tea Party


Thank you kindly for supporting this wonderful blog stay tuned for more upcoming tutorial to inspire you to create.

Happy crafting xoxox

Glori


Friday, June 15, 2012

Father's Day Album Using Want2Scrap


The Sakura Design Team team up with Want2Scrap, I chose the Daddy album for my husband for Father's Day.  With my children's help we created an amazing keepsake for him using Terri Sproul Mixers, 3D Crystal Lacquer and Want2Scrap Products.


Chipboard Album
Materials:
  • Want2Scrap Daddy Album
  • Want2Scrap Nestabling Circle
  • Want2Scrap Say it with bling
  • 3D Crystal Laquer
  • Terri Sproul Mixers:  Garnet Pearl, Green Pearl, Tanzanite Pearl, Shimmer Pink Sapphire, Rose Quartz Pearl, Shimmer Purple
  • Assorted Tissue Paper
  • Scrap Paper
  • Stamps
  • Photos
  • Scissors
  • Ink Pads (I used Tim Holtz Distress Ink Pad: Tattered Rose, Vintage Photo, Walnut Stain - Staz-on Timber Brown)
Trace child's hand.  I had my daughter use the tissue paper, 3D Crystal Lacquer and Terri Sproul Mixers.

Close up shot of her working.  I traced my son's hand and I  did this part for him.

Adding her family drawing to the cover.

The concentration to place bling throughout the book.

The following is the finished book I did black out my children's names off the back cover.  My daughter really enjoyed helping me with this project.

The back page with a letter to daddy from my daughter.  Left side:  My husband and I surrounded in bling. 

Close up of the "Us" page

Right Page:  Kids
Left Page:  Son's Hand Print

Close up of the kids page with circle bling

Son's Handprint - Terri Sproul Mixers: Tanzanite Pearl and Garnet Pearl with Circle Bling

Daughter's Handprint - Shimmer Pink Sapphire and Purple Shimmer with Circle Bling

Close up of the Family.  The heads are my son's fingerprint (Tim Holtz Tattered Rose).  My daughter drew the family.

Finished Album