Showing posts with label altered. Show all posts

Tuesday, April 30, 2013

Time Flies Altered Sakura Milk Can


I altered Sakura’s little milk can into a personalized treasure tin using Sakura Crystal Lacquer, paper, burlap and ink.
Here’s the milk can:


I measured the can and cut my paper to fit.  I have a stack of clock faces printed on heavy paper.  You could also use a stamp, a printed graphic or patterned paper.


My paper did not fit all the way around the can, so I cut a little extra piece.
I stamped my phrase on the paper with Colorbox Chalk Ink in dark brown (“Tempus fugit,” or “Time flies”).
 
I colored the paper with 7 Gypsies Color Wash (pastel green) and let it dry.


Crystal Lacquer is a great adhesive and it works on metal! I coated the back of the paper with Crystal Lacquer.  You could coat the can instead, but I felt like I had better control this way.  I poured a little Crystal Lacquer onto a plastic container lid and used a foam brush to apply it to the paper.  Then I placed the paper on the can.
 
After it felt dry, I applied a coat of Crystal Lacquer on top of the paper.
I made the burlap wings from the Angel Wings die by Sizzix.  The wing was too big for my can, so I cut one out of paper and trimmed it to use it as a template for trimming the burlap ones. 
 
 
I cut out the burlap wings and then trimmed then, using the paper wing as a guide:


For tips on diecutting fabric, please visit my tutorial here.
Then I added a little distress ink to the edges of the wings (vintage photo and rusty hinge):

I adhered the wings to the can with more Crystal Lacquer.  I put one on and let it dry before I added the other.  I put some Crystal Lacquer on the can and some on the back of the top part of the wing, then held the wing tightly to the can for a couple of minutes so the Crystal Lacquer could set.  Then I set the can on its side with the wing up and let the Crystal Lacquer harden before adding the second wing.
I added clock gears to the wings with more Crystal Lacquer and stabilized the can so they wouldn’t fall off before the Crystal Lacquer hardened.  I inserted a bottle into the can and then used two full bottles to keep the bottle/can combination from rolling:

Once the gears were on securely, my treasure tin was ready!


Sakura is hosting a blog hop on May 18th!  The theme is “Fantasy” and Sakura’s Design Team is dreaming up amazing art to share with you on that day!  There will be prizes, too!  So be sure to check back here on May 18th!

During the month of May, you can get 20% off your total order at Sakura Hobby Craft!  If you haven't tried Crystal Lacquer, now is the time to get some!  Sakura also has beautiful powders for coloring the Crystal Lacquer, and lots of jewelry findings!  Enter the code Sakura05 at checkout.


Thursday, February 14, 2013

Last Minute Valentine Candy Box


Need a last minute gift without spending a lot of money?

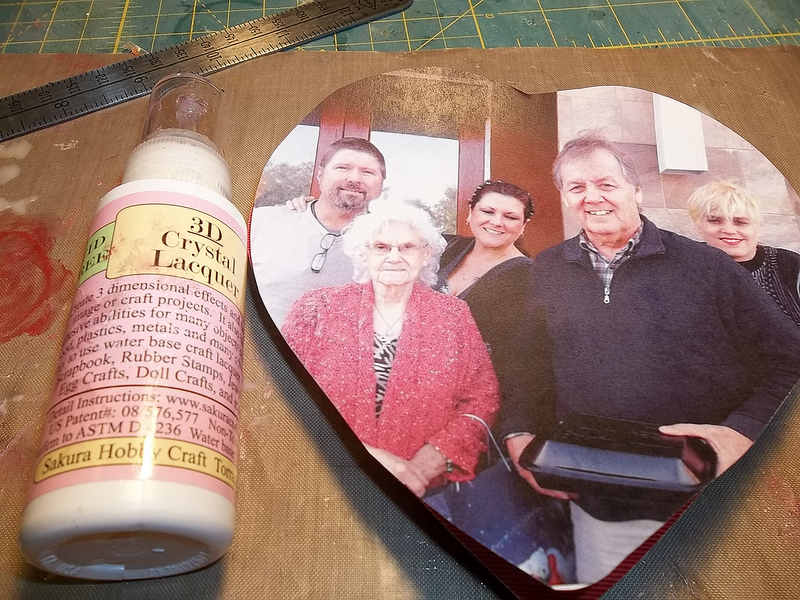
Run to the Dollar Store and buy a small heart shaped box of chocolate. Decorate it with a photo of you and your loved one (or of anything), embellish it and give it as a gift. The candy will last 5 minutes, but the box will last forever! Also pick up some extra and make a special one for Mother's Day!


Materials
Box of Candy- from Dollar Store.
Glue-Elmers or Mod Podge
White Paint
Laquer- 3d Crystal Lacquer
Embellishments- beads, broken pieces of jewelry
Photo- laser copy (from a laser printer or a laser copy). If you use an ink jet printer make sure to seal your photo with fixative before lacquering.


Directions
Find a suitable photo (measure your box) and print out (you can either use a fixative if you are using ink jet or bring to copy store for a color copy).


Take shrink wrap paper off your box

Make sure the photo will fit your box of candy. Trace to heart shape on the photo and cut out.


If your box of candy is any color than white, paint it white- let dry (this is because sometimes you can see through the photo to the red paper- I tried it three times and it showed through when I added glue).


Glue your photo to box of candy- let dry


Add any collage elements.

Using a lacquer, like Sakura 3D Cystal Lacquer, put a light coat on over the photo.


Add embellishments, like beads. I used a thin layer of 3D Cystal Lacquer to glue the beads to the edge. Then once it sat up a bit, I went over the inside edge of the beads with more 3D Cystal Lacquer, so it had more to anchor them to the box.


Add any additional embellishments.


Put the lid on your candy and you are ready to go.

Keep in mind, this process will take about 1 1/2 hours for total project with drying time, so don't be too last minute!

Tanya Ruffin
www.tanyaruffin.com


Thursday, December 6, 2012

Gift Canister Repurpose


I end up with a lot of canisters from a shake I drink daily and have been saving them for a while waiting for inspiration to hit me. One thing I made is a container for Christmas gifts. I often have a lot of small items to give that I may not be in the position to place in a stocking (i.e. mailed gifts). So I came up with a cute recycled alternative to the gift bag


Materials:
Canister
Scrapbook paper
ribbon
Outline Stickers from Sparkraft Enterprises
Terri Sproul Mixers- Interference Blue Pearl
Mailing Tags

Miscellaneous inks
*any additional embellishments


sakuracraft.com


Start of with clean canisters by making sure there are no signs of what originally came in the canister. The first one I pulled the label off and the others I just covered it.


Cut your scrapbook paper to fit around the canister with a slight overlap.


I mixed up some  3D Crystal Laquer and Terri Sproul Mixers- Interference Blue Pearl and painted over the surface of the whole canister.


Next I covered the lid of the canister. Since this lid has a lip on it, I placed the paper in the center and left the edge of the lid visible. The color matched the paper so I just painted with a coat of the  3D Crystal Laquer and Terri Sproul Mixers- Interference Blue Pearl.


Next take some shipping tags, cut to size and take the string out. Cover with a coat of ink (use a light color- I used a distressed green).


Take your Outline Stickers from Sparkraft Enterprises and place on your tag. We will use the stickers as a resist for a second coat of darker ink. If you place your stickers back on the backer sheet when done, you can use several times.

Hang the stickers off the tag for a nice random effect.


Keep both coats fairly light since this is a name tag and we will need to write on top of it.

Finished tags.

Cover the edge of the lid with white ribbon and tie on your tag.
You can embellish your canister with other ribbon or findings.

I wanted my canisters to be used after Christmas so I avoid overly Christmas imagery on the decorating of the canister. The tags are a different story!

I played with decorating the lids too.


Tanya Ruffin

Create Studios

Tuesday, November 27, 2012

Altered Tins for Gift Giving

Altoid Tins are the perfect size for jewelry gift giving!
Supplies:
Gears - Oriental Trading CO.
Keyhole - Tim Holtz
Large Gem
Microbeads
Trim
Fabric
Pattern Paper 
Gift for Giving!

Press Creative Paperclay® onto the tin. Press gear and keyhole into the wet paperclay. Set aside to dry, may take several days. When dry paint with Sakura 3D Crystal Lacquer and Terri Sproul Mixers Copper Penny Pearl. Adhere gold microbeads around the edge with Sakura 3D Crystal Lacquer.  Then adhere fabric and trim inside and trim outside.  Ahdere large gem to one of the gears with Sakura 3D Crystal Lacquer.  
Cut pattern paper to cover the bottom and inside lid of the tin and adhere with Sakura 3D Crystal Lacquer.  
Have fun creating gift boxes this season!