Showing posts with label Milk Tins. Show all posts

Friday, May 17, 2013

Sequin Topairy

For my second milk tin project, I wanted to try a Topairy.
Topairy has been on my list of want to try for awhile.


I had used sequins in my other milk tin project, and since I had the sequin storage tote out, I decided to use more of my stash.  I selected these larger floral sequins and starting attaching them to a 3 inch styrofoam ball using 3D Crystal Lacquer (so if there was a space between them, it would be covered with the lacquer).


For the milk tin, I cut one of the styrofoam in half and formed it to find in the top part of the milk tin.  I covered the styrofoam with some dyed fibres I had received from a friend.
I, then, used double sided adhesive to add the rows of ribbons (vintage Stampin' Up) around the bottom of the milk tin.
Once the sequins were completely dry, I wrapped the stick part with fibres, and forced it into the styrofoam inside the milk tin.  I added the corrugated fence after it sat on my shelf for a couple days and I thought it needed more.  


During the month of May, you can get 20% off your total order at Sakura Hobby Craft.  Now is the perfect time to try Crystal Lacquer and Sakura’s other great products!  Just enter the code “Sakura05” at checkout.

Also, Sakura is hosting a blog hop on May 18th!  The theme is “Fantasy” and Sakura’s Design
Team is dreaming up amazing art to share with you on that day!  There will be prizes, too!  So be sure to check back here on May 18th!

Thursday, May 9, 2013

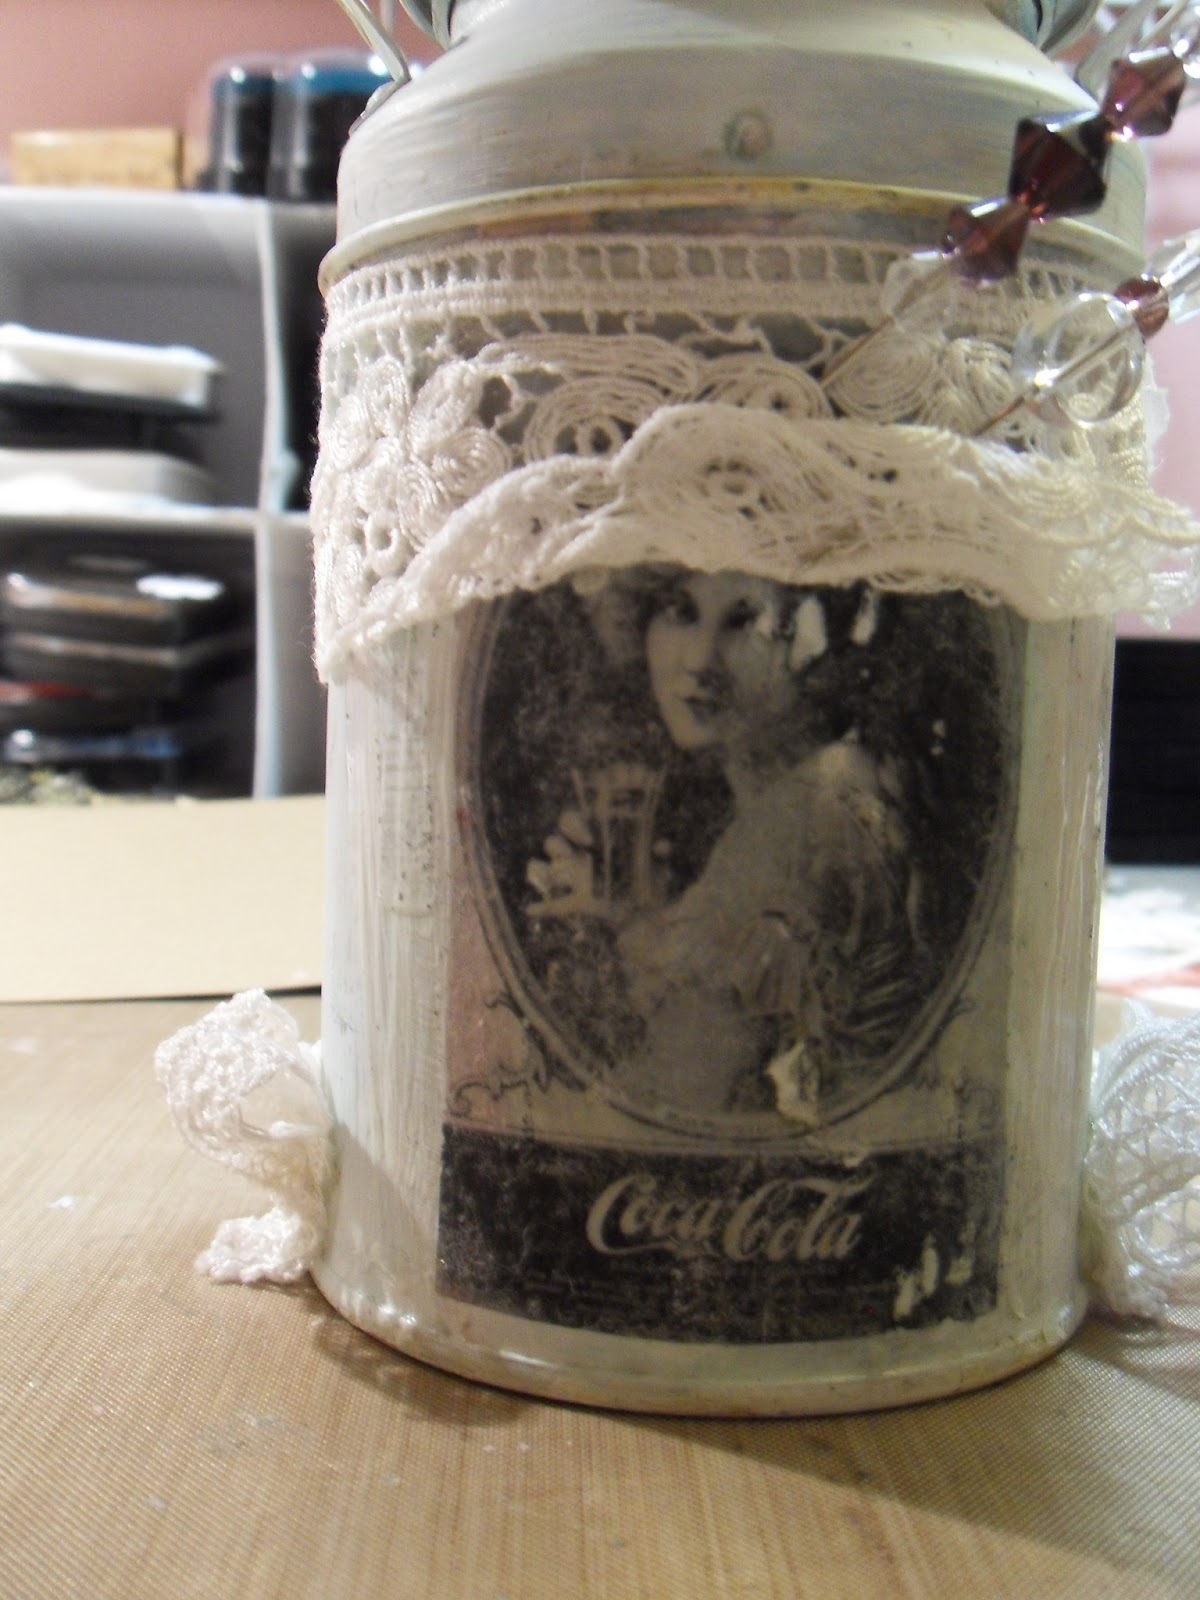
Vintage Altered Milk Tin

 
Hi! Today I am going to show you how
I altered my milk tin. The list of supplies I used are:

Sakura Hobby Craft Milk Tins
Sakura 3D Crystal Lacquer
Terri Sproul Shimmer Mixers
Adirondack Metallics Paint Dauber Gold
Vintage Graphics Printed from Laser Printer
Mod Podge
White Gesso
Lace/Trim
Embellishments
 
 
From now until the end of May you can get 20% off
your entire order with the code" Sakura05"
 
 
First I painted my tin with white gesso.
 Then I printed my Vintage Pictures Inverted
so when I Mod Podge my picture face down it would be a mirror image.


Next I Took a foam applicator and applied them to my milk tin
 
Then I placed my image face down onto my tin.
I did not mod podge after application as I did not
want a resist from the mod podge when I colored the tin.
 
When completely dry I soaked down the paper
with water and rubbed off the paper, creating a
transferred image with only ink remaining on my tin.
 
 
And as you can see my inverted picture is now facing the right way.
As I keep rubbing off the wet paper my image becomes clear.


I did the same method to my second image.
 
I mixed up some shimmer mixers from
Terri Sproul with water and binder powder.

Then I painted and drizzled down my tin and added some
gold paint rubbed in with my fingers until I was happy.

Then I took a rag and cleaned off my image
and cleaned the can a bit by rubbing it with a cloth.
 
 
Next I started to place my lace and embellishments.
 I used 3D Crystal Lacquer as well as hot glue. 


Here I made a flower embellishment with a piece of
 lace gathered and I used 3D Crystal Lacquer to adhere it with a pearl center.
 
 
 And the final photo..
 
 
 I hope you enjoyed todays tutorial and don't forget 
With Coupon Code  Sakura05
you can get 20% off your order!
for the entire month of May.


Friday, May 3, 2013

Milk Tin of DREAMS

Hi there!  I hope everyone is has had an AWESOME creative week!!

Today, before I begin my project I want to tell you about this amazing small business - Sakura Hobby Craft.  I was given this opportunity to be on their Design Team to showcase their products.  
I have never met them in person, but they do everything they can to please the customers and if we have a question.
All they ask in return is to check out their products and hopefully order from them.  Their products are not available anywhere else in my area and YOU are missing out if you haven't tried them!!!

OK - on to my project for this week.......My Milk Tin of Dreams.

As some of you know (those who follow me), I LIKE TREES!  I am concentrating on working on MY DREAMS this year and so what better way to have my dreams front and centre in my studio than on a Dream Tree.  The little milk tin from Sakura is the perfect container!


Its the perfect time to get branches around here, and before the ban on the Elm trees takes effect.  I cut one that had several off branches.  
In the bottom of the milk tin, I added some old metal printing letters I have had for ages - they are the perfect thing to weight down the milk tin so it doesn't become top heavy.
I filled the milk tin 3/4 full of an old matte medium that I was not happy with and its still not fully dry (I filled it last Friday)...its thickened more and more every day.
On the tin, I added a vintage scrapbook paper and glued on buttons.


On the tree, I added 2 strands of flower sequin string I made using the little flower sequins and perle cotton.  I made a knot between each sequin as they were added with a needle.

For the ornaments on the tree, I used some tags that I added photos to and then used the 3D Crystal Color Lacquer for added colour and dimension around the edges.  

I then tied more perle cotton on the tags and placed them randomly on the tree.  
I had small paper flowers in a little container asking to be used and so I glued them randomly onto the tree branches along with the butterfly.  


The Dream Tree can be images of all your dreams, or would make a great gift for the Mothers in your life with photos of all their children or grandchildren.

When you order this month, use the discount code: Sakura05 you will receive 20% off your total order.